
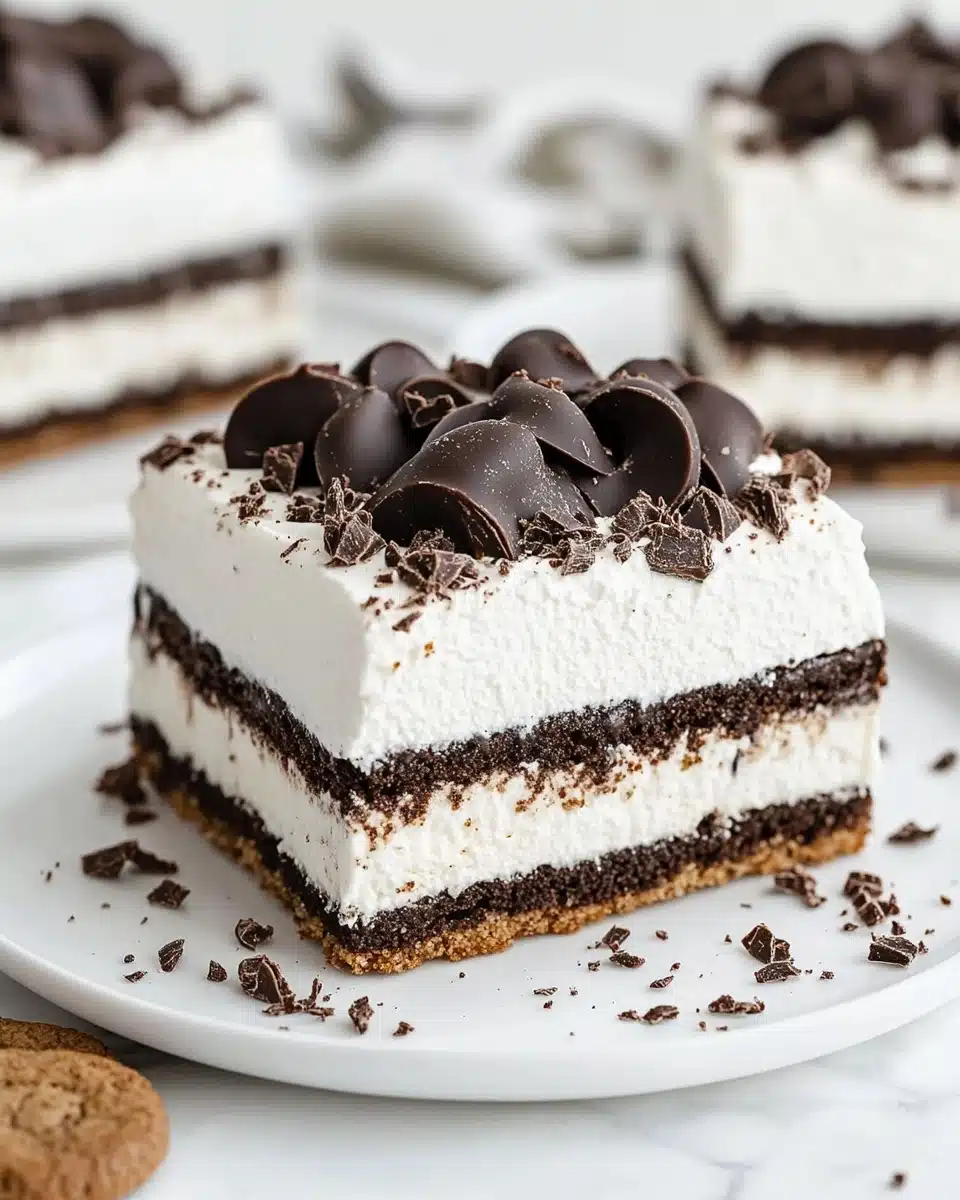
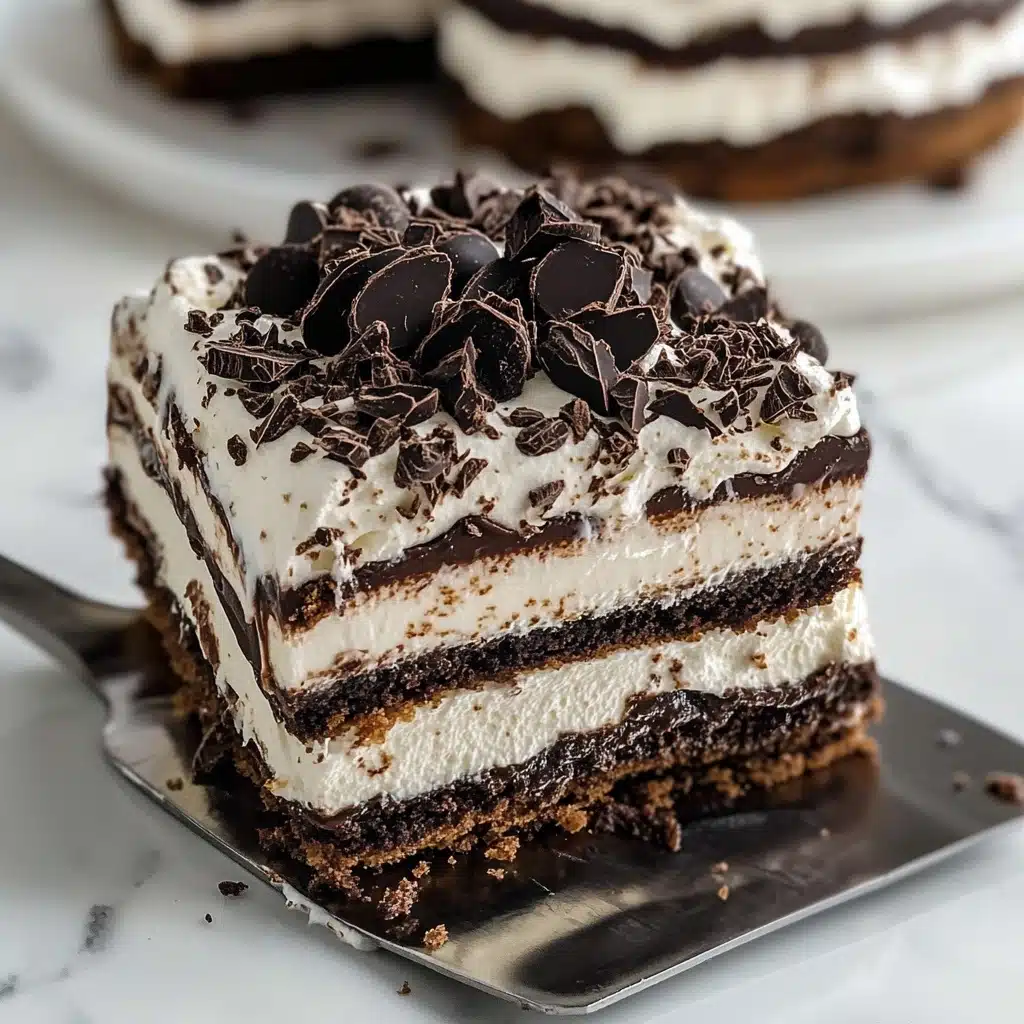
If there’s one dessert guaranteed to steal the spotlight at every summer party, it’s this No Bake Ice Cream Sandwich Cake. Dreamy layers of ice cream sandwiches, velvety Cool Whip, gooey hot fudge, and a crunchy Oreo topping—all come together into one unforgettable, celebratory treat. The best part? It comes together with barely any effort and zero oven time!
Why You’ll Love This Recipe
- Truly No-Bake: You don’t have to turn on the oven or stove—just layer, freeze, and serve for a stunning homemade dessert.
- Crowd-Pleasing Layers: Each bite brings together creamy, chocolatey, and crunchy textures that both kids and adults go absolutely wild for.
- Customizable Magic: Assemble it with your favorite ice cream sandwich flavors or fun mix-ins—the possibilities are endless!
- Perfect Make-Ahead Dessert: It’s just as delicious fresh or pulled straight from the freezer at a moment’s notice, making it the ideal party treat.
Ingredients You’ll Need
You’ll only need a handful of store-bought favorites for this easy No Bake Ice Cream Sandwich Cake. Each one is essential for building those glorious layers of cold, creamy, chocolatey bliss.
- Ice Cream Sandwiches (21 count): The foundation of the cake! These classic treats provide the soft, chewy cake and ice cream in each bite. Vanilla is traditional, but you can swap in other flavors if you like.
- Hot Fudge Sauce (11.75 ounces): Warm and pourable, this adds a decadent, molten chocolate layer that seeps into the sandwiches for fudgy goodness.
- Oreos (18, crushed): Adds a crunchy chocolate finish and even more variety in texture. Their cookie-and-cream flavor is pure nostalgia!
- Cool Whip (16-ounce tub, divided): A cloudlike topping that gives the cake a creamy, “frosted” effect and helps hold everything together.
Variations
This cake was practically born to be customized! Don’t be afraid to make it your own—whether you need to cater to allergies, dietary preferences, or just want to play with fun new flavors.
- Different Ice Cream Sandwich Flavors: Try chocolate, Neapolitan, or even mint chip sandwiches to change up the base flavor.
- Swap Cool Whip for Real Whipped Cream: Use freshly whipped cream for a richer, homemade touch—just stabilize it so it holds up in the freezer.
- Add Layers of Fruit or Candy: Sprinkle in chopped strawberries or your favorite chopped candy bars for colorful pops and extra excitement.
- Gluten-Free Version: Use gluten-free ice cream sandwiches and cookies to make this treat celiac-friendly—no one will know the difference!
How to Make No Bake Ice Cream Sandwich Cake
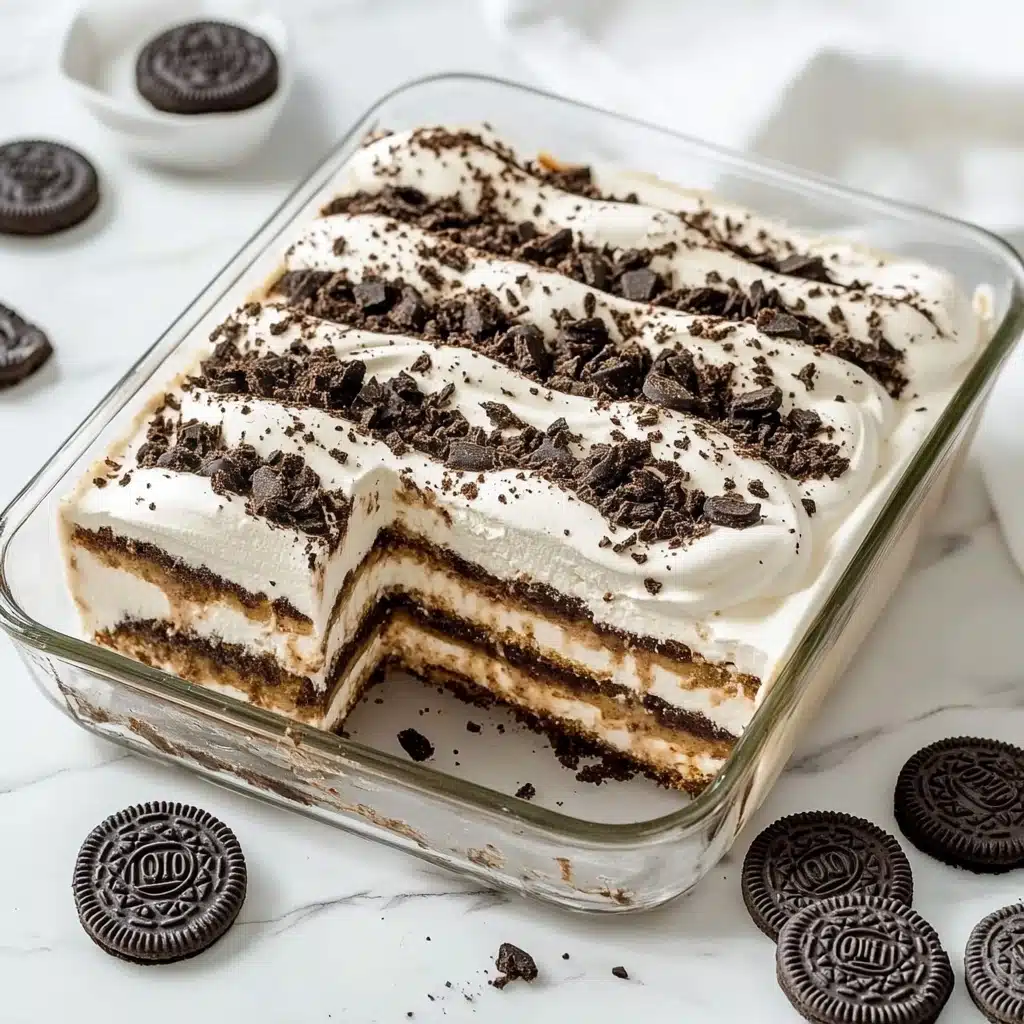
Step 1: Prepare Your Pan
Start by grabbing a 9×13 inch pan—glass or metal both work well. For easiest serving, you can line it with parchment or foil, letting the edges hang over for a simple lift-and-slice later. This makes such a difference when it’s time to serve up neat, gorgeous squares of your No Bake Ice Cream Sandwich Cake.
Step 2: Layer the Ice Cream Sandwiches
Unwrap your ice cream sandwiches and arrange them in a single, snug layer on the bottom of the pan. Don’t worry if you have to trim one or two to fit—just piece them together like a delicious puzzle. This forms the sturdy, ice-creamy base of your cake.
Step 3: Spread Hot Fudge and Cool Whip
Gently warm your hot fudge so it’s pourable, then drizzle about one-third over the sandwiches. Spread it lightly with an offset spatula for even coverage before topping with half of your Cool Whip. This dreamy layer locks in the chocolatey richness and adds an irresistible creamy contrast.
Step 4: Repeat and Finish with Oreos
Add a second layer of ice cream sandwiches just as you did before. Top with another third of the hot fudge, then the rest of your Cool Whip. Finally, sprinkle crushed Oreos all over, and drizzle the remaining hot fudge on top for a glorious, showstopping finish!
Step 5: Freeze Until Set
Transfer the whole pan to your freezer and let your No Bake Ice Cream Sandwich Cake set for at least four hours. Overnight is even better for perfect slices. When ready to serve, let it sit at room temperature for a few minutes so it’s easy to cut through.
Pro Tips for Making No Bake Ice Cream Sandwich Cake
- Quick Sandwich Unwrapping: Enlist some helpers or unwrap your ice cream sandwiches in advance and freeze them on a tray—this keeps them perfectly chilled and ready to assemble.
- Hot Fudge Handling: Warm the fudge gently in the microwave until it’s just pourable—too hot and it’ll melt the ice cream, too cold and it’ll be tough to spread.
- Slicing Like a Pro: Let the cake sit out for 5–8 minutes before slicing and use a sharp knife dipped in warm water for the cleanest cuts and prettiest servings.
- Oreos Crunch Factor: For extra texture, add some coarsely crushed Oreos between the layers—not just on top!
How to Serve No Bake Ice Cream Sandwich Cake
Garnishes
Take your cake to the next level with a cloud of whipped cream, a scatter of sprinkles, or even a drizzle of caramel sauce right before serving. For the ultra-decadent crowd, a handful of mini chocolate chips or chopped nuts makes each slice look (and taste) extra celebratory!
Side Dishes
This dessert shines all by itself, but if you’d like to serve something on the side, try ultra-refreshing fresh fruit—like berries or cubes of melon. A platter of salty snacks (like pretzels or popcorn) is also amazing, offering a twangy contrast to the cake’s sweetness.
Creative Ways to Present
For a fun twist, use a cookie cutter to stamp out individual servings after freezing, or cut into small squares and skewer them with popsicle sticks for “ice cream cake pops.” You can even set out a toppings bar and let guests decorate their own pieces. With No Bake Ice Cream Sandwich Cake, there’s truly no wrong way to serve it!
Make Ahead and Storage
Storing Leftovers
To keep your cake fresh, simply wrap the pan tightly in aluminum foil or plastic wrap before popping it back in the freezer. It will stay delicious and creamy for up to a week—but good luck making it last that long!
Freezing
This recipe is made for freezing and actually gets better with time, meaning you can make it several days in advance. For longer storage, cut into squares, wrap tightly, and store in a freezer-safe container for up to a month.
Reheating
There’s no need to reheat—just let the No Bake Ice Cream Sandwich Cake sit at room temperature for 5–10 minutes before slicing, so it softens slightly for the perfect texture and easy serving.
FAQs
-
Can I make No Bake Ice Cream Sandwich Cake ahead of time?
Absolutely! In fact, this cake is at its very best if you make it the day before you plan to serve. Just assemble, cover tightly, and freeze—then let it sit for a few minutes at room temperature before slicing and enjoying.
-
What’s the best way to slice and serve this cake?
Let the cake rest at room temperature for 5–8 minutes for easier slicing. For clean slices, dip a big, sharp knife in hot water between each cut and wipe clean each time for those picture-perfect squares.
-
Can I use homemade hot fudge or whipped cream?
Yes! Homemade hot fudge and fresh whipped cream are fantastic upgrades. If using homemade whipped cream, be sure to stabilize it so it keeps its shape in the freezer.
-
How can I make a smaller (or larger) No Bake Ice Cream Sandwich Cake?
For a smaller batch, assemble your cake in an 8×8-inch pan and halve the ingredients. For a crowd, double the recipe and build it in a large roasting pan or on a sheet tray!
Final Thoughts
If you’re craving a show-stopping dessert that delivers maximum delight for minimal effort, you can’t go wrong with this No Bake Ice Cream Sandwich Cake. I hope you give it a try this summer (or whenever you need an easy win!), and share the joy with friends and family—because nothing brings people together quite like a slice of this frosty, nostalgic masterpiece. Happy celebrating!
Print
No Bake Ice Cream Sandwich Cake Recipe
- Prep Time: 10 minutes
- Total Time: 4 hours 10 minutes
- Yield: 12 servings 1x
- Category: Dessert
- Method: No-Bake
- Cuisine: American
- Diet: Vegetarian
Description
This No-Bake Ice Cream Sandwich Cake is a delightful and easy-to-make dessert that is perfect for any occasion. Layers of ice cream sandwiches, hot fudge, Cool Whip, and crushed Oreos come together to create a delicious frozen treat that will impress your family and friends.
Ingredients
Ice Cream Sandwiches:
- 21 ice cream sandwiches
Oreo Layer:
- 18 Oreos (or similar, crushed)
Hot Fudge Layer:
- 11.75 ounces hot fudge
Cool Whip Layer:
- 16-ounce tub Cool Whip (thawed and divided)
Instructions
- Arrange a layer of ice cream sandwiches: Place a layer of ice cream sandwiches on the bottom of a 9×13 inch pan.
- Add hot fudge: Spread ⅓ of the hot fudge over the ice cream sandwiches. Top with half of the Cool Whip.
- Repeat layers: Create another layer of sandwiches, hot fudge, and Cool Whip.
- Add crushed Oreos: Sprinkle the crushed Oreos over the top and drizzle the remaining ⅓ of the hot fudge.
- Freeze: Freeze the cake for at least 4 hours.
Notes
- Storage: Wrap tightly with aluminum foil or plastic wrap. Keeps well in the freezer for up to 1 week.
- Make Ahead: Can be prepared 3-4 days in advance. Let it soften slightly before serving.
Nutrition
- Serving Size: 1 slice
- Calories: 527 kcal
- Sugar: 46g
- Sodium: 351mg
- Fat: 19g
- Saturated Fat: 6g
- Unsaturated Fat: 11g
- Trans Fat: 0.01g
- Carbohydrates: 85g
- Fiber: 1g
- Protein: 9g
- Cholesterol: 32mg


