
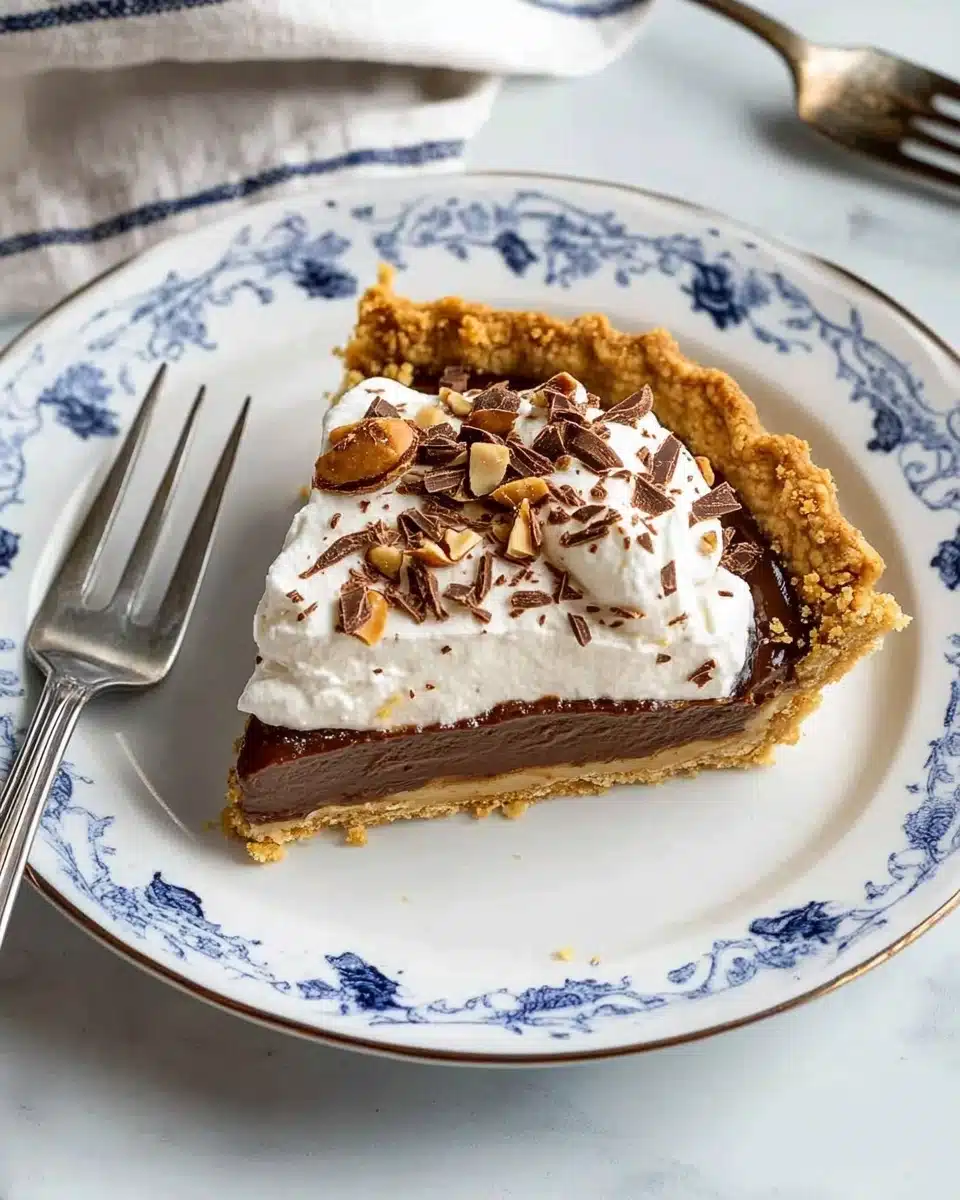
Get ready to fall in love with Chocolate Icebox Pie—a dreamy, old-fashioned dessert that pairs a buttery graham cracker crust with a silky, chocolate-marshmallow custard filling, all topped with billowy whipped cream and chocolate shavings. It’s the ultimate crowd-pleaser and a sweet slice of nostalgia that always disappears fast at the table!
Why You’ll Love This Recipe
- Buttery, Crunchy Crust: The graham cracker crust bakes up golden and offers that irresistible crunch against the creamy filling.
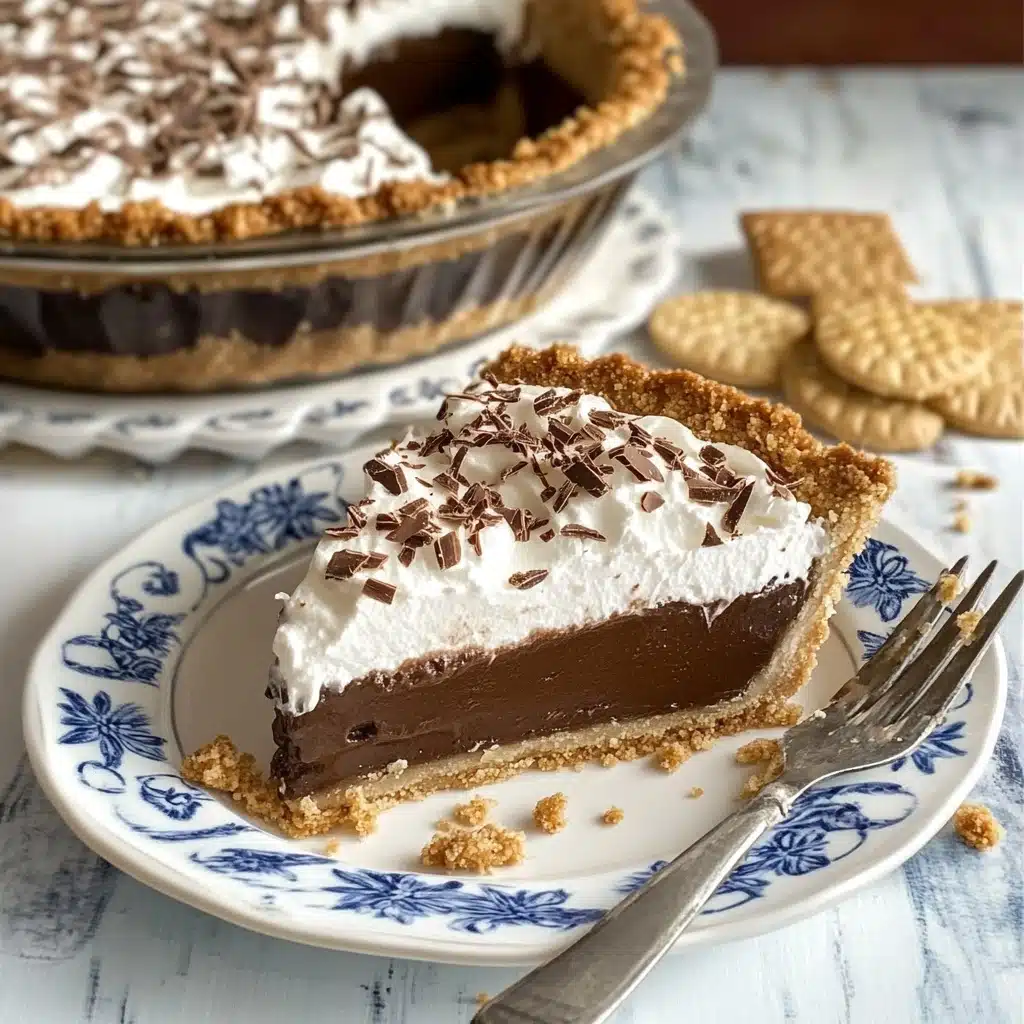
- Dreamy Chocolate Filling: Rich, smooth, and not-too-sweet, the chocolate-marshmallow custard sets up perfectly for sliceable decadence.
- Make-Ahead Magic: Chocolate Icebox Pie actually improves as it chills—making it the ultimate dessert for entertaining or prep-ahead treats.
- Topping Heaven: Clouds of fresh whipped cream and a shower of chocolate shavings make every bite pure dessert bliss.
Ingredients You’ll Need
One of the most charming things about Chocolate Icebox Pie is how the simplest, most familiar ingredients—each bringing something wonderful—work together to create something truly special. Here’s what you’ll need, and why each one matters.
- Graham cracker crumbs: These provide the rustic, sweet, and toasty base that holds everything together (and tastes like childhood in every bite).
- Unsalted butter: Brings richness and moisture, ensuring your crumb crust bakes up golden and flavorful.
- Granulated sugar: Sweetens both the crust and the silky custard filling, balancing out the deep chocolate flavors.
- All-purpose flour: Helps the custard filling set, giving it a luscious but sliceable texture.
- Unsweetened chocolate squares: The hero of the filling—delivers pure, undiluted chocolate flavor without excessive sweetness.
- Evaporated milk or heavy whipping cream: Either option yields wonderful results; evaporated milk gives a classic, slightly caramelly note, while cream makes things extra rich.
- Large egg yolks: Thicken the custard and provide that gorgeous, velvety body.
- Small marshmallows: The mid-century secret—melt into the filling to create unmatched silkiness (and a hint of nostalgia).
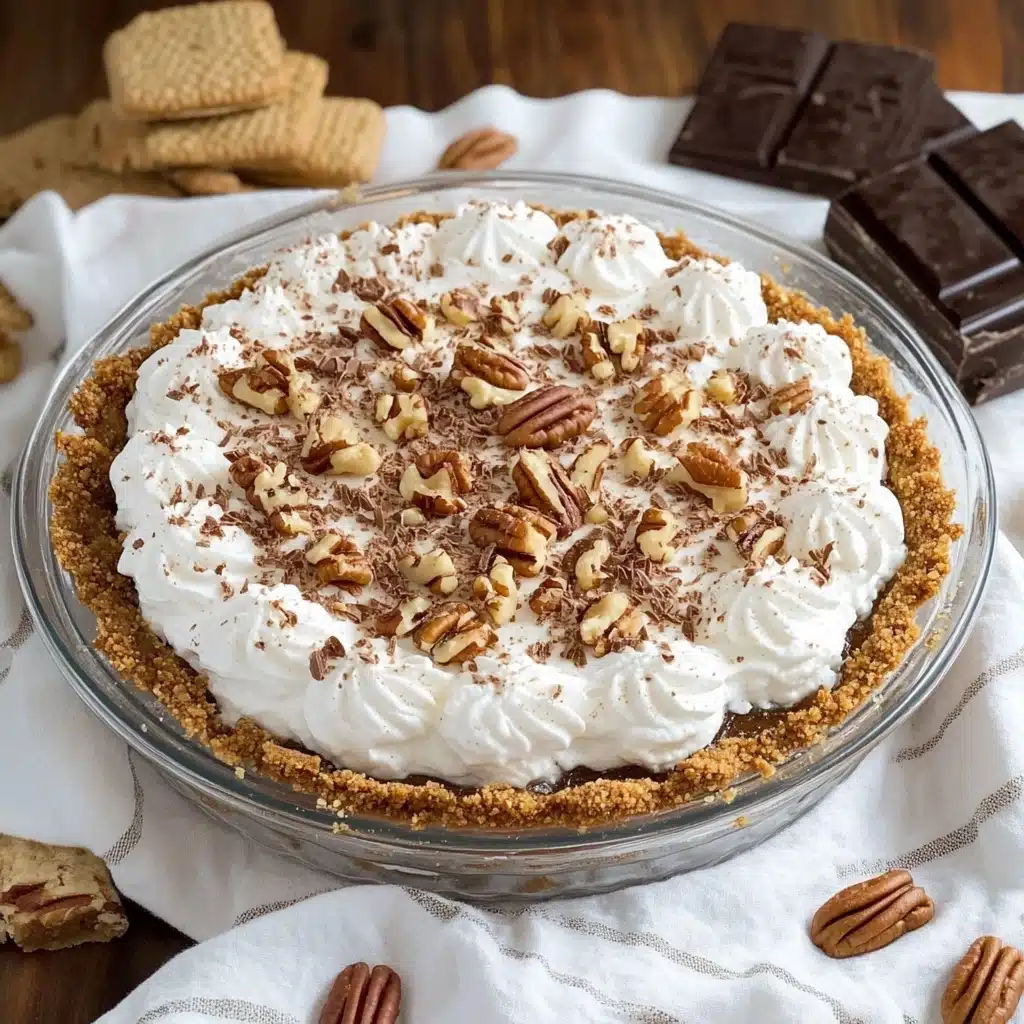
- Chopped pecans: A sprinkle on top adds nutty crunch and aroma—totally optional but highly recommended for extra flair.
- Semisweet chocolate: For fresh, elegant chocolate shavings on top—because more chocolate is always a good idea.
- Heavy whipping cream (for topping): Whipped to soft peaks, lending a cool, creamy balance to the pie’s intensity.
- Salt: Just a dash makes the chocolate sing and the sweetness balanced.
Variations
One of my favorite things about this classic pie? You can make Chocolate Icebox Pie completely your own! Feel free to tailor it to your pantry, your cravings, or the needs of your guests—it’s a fabulously forgiving recipe.
- Nut-Free Twist: Skip the chopped pecans on top (or try toasted coconut flakes) for a nut-free, equally delightful finish.
- “Rocky Road” Effect: If you use kosher marshmallows, you’ll get little pockets of marshmallow in the filling—so fun and delicious!
- Boozy Adult Version: Stir a tablespoon of coffee liqueur or bourbon into the custard (off the heat) for tempted grown-up flavor.
- Cookie Crust Substitute: Try chocolate wafer cookies, vanilla wafers, or even Oreo crumbs instead of graham crackers for the base—each offers a fun new twist.
How to Make Chocolate Icebox Pie
Step 1: Make and Bake the Graham Cracker Crust
Preheat your oven to 375°F. Stir together the graham cracker crumbs, room-temperature butter, and sugar in a bowl until every crumb is glistening and moistened. Press this mixture evenly into your pie dish, covering the bottom and sides well. Bake for about 8 minutes, just until set and lightly golden. Allow the crust to cool—the aroma is irresistible!
Step 2: Prepare the Custard Filling
In a saucepan, whisk together 2/3 cup sugar, a pinch of salt, and flour. Melt the unsweetened chocolate (a few bursts in the microwave works wonders), then pour it into the dry mix with your evaporated milk or cream. Whisk until smooth and chocolatey, then add a cup of water and the beaten egg yolks. Set the pan over medium-low heat and whisk steadily—patience is key here, as the mixture gently cooks and thickens into a glossy custard, about 10–15 minutes.
Step 3: Finish the Chocolate Magic
When your custard is thick enough to coat a spoon and cling in luscious ribbons to the whisk, remove it from the heat and immediately stir in the butter. Add the mini marshmallows—watch them melt and vanish into the custard, working their gooey magic—and set the filling aside at room temperature to cool.
Step 4: Assemble and Chill
Pour the cooled chocolate custard into the baked graham crust, smoothing it out with a spatula. Place the pie uncovered in your refrigerator and chill at least 6 hours, or preferably overnight. This patience pays off—the flavors meld and the filling sets perfectly!
Step 5: Whip & Decorate
At least 1.5 hours before serving, whip the heavy cream with a little sugar until it’s fluffy and soft peaks form. Spoon or pipe the whipped cream over the pie, then top with chocolate shavings and chopped pecans. Chill briefly, then slice up and admire those pretty layers when you serve.
Pro Tips for Making Chocolate Icebox Pie
- Custard Consistency Counts: Whisk the custard constantly and don’t rush—it should be thick enough to coat the back of the spoon but not clumpy or overcooked.
- Chill Time Wins: For firm, sliceable pieces, don’t shortcut the chilling time—overnight is ideal for the dreamiest texture!
- Marshmallow Melting: Add marshmallows after removing from heat; stir well so they dissolve seamlessly into the filling unless you’re going for that “rocky road” vibe.
- Crust Perfection: Use a measuring cup or glass to evenly press the crust up the sides and bottom—a uniform crust means every slice is gorgeous and holds together.
How to Serve Chocolate Icebox Pie
Garnishes
This pie practically begs for a lavish crown of whipped cream, but don’t stop there! Scatter on chocolate shavings for sparkle, add toasted pecans for crunch, or even dust with just a hint of cinnamon or espresso powder to tease out more chocolatey depth.
Side Dishes
A thick slice of Chocolate Icebox Pie shines after a lighter meal, but if you’re feeling extra, serve with a scoop of vanilla bean ice cream or a handful of fresh strawberries. A glass of cold milk or a strong cup of coffee is perfect for contrast and cleansing the palate between bites.
Creative Ways to Present
For parties, try making individual pies in mini tart pans or mason jars—adorable and portable! A drizzle of salted caramel, a few shards of homemade brittle, or a scattering of colorful berries are fun upgrades that make Chocolate Icebox Pie feel worthy of any special occasion.
Make Ahead and Storage
Storing Leftovers
Store leftover Chocolate Icebox Pie, covered loosely, in the refrigerator. It will keep up to 4 days—if you can resist sneaking forkfuls every time you open the fridge! The crust stays crisp and the filling holds beautifully.
Freezing
Yes, you can freeze Chocolate Icebox Pie! Just wrap the pie tightly (without the whipped cream topping if you can) and freeze for up to one month. Thaw overnight in the fridge, add fresh whipped cream, and you’re back in business.
Reheating
No need to reheat—this chilled wonder is meant to be enjoyed cold! If you’ve frozen the pie, let it thaw gently in the fridge. For a softer filling, leave at room temperature for 10–15 minutes before slicing and serving.
FAQs
-
Can I make Chocolate Icebox Pie in advance?
Absolutely! This pie is even better when made the night before—just keep it chilled and wait to add the whipped cream and garnishes until a couple hours before serving for the freshest finish.
-
Can I substitute the marshmallows or leave them out?
The marshmallows help create that silky, plush filling, but if you’re avoiding them, you can replace with about 1/4 cup extra sugar and 1 tablespoon extra butter, though the texture will be a bit different.
-
What can I use instead of graham crackers for the crust?
Chocolate wafer cookies, vanilla wafers, or even Oreo cookies (just skip extra sugar if using a sweet cookie) all work beautifully and can give the pie a new flavor twist.
-
How do I know the chocolate custard is thick enough?
When it coats the back of a spoon and holds a clear line if you run your finger through it, your custard is good to go! If it clings to the whisk in soft, glossy ribbons, it’s ready to be cooled and poured into the crust.
Final Thoughts
If you’re craving an easy, show-stopping dessert, Chocolate Icebox Pie is calling your name. With its velvety filling, crisp crust, and nostalgia in every bite, it’s sure to become a new family favorite. I hope you’ll give it a try and let it bring a little extra joy—and chocolatey goodness—to your week!
Print
Chocolate Icebox Pie Recipe
- Prep Time: 30 minutes
- Cook Time: 8 minutes
- Total Time: 7 hours 30 minutes
- Yield: 1 9-inch pie
- Category: Dessert
- Method: Baking, Chilling
- Cuisine: American
- Diet: Vegetarian
Description
Indulge in a decadent and creamy Chocolate Icebox Pie that is perfect for any occasion. This no-bake pie features a buttery graham cracker crust filled with a rich chocolate custard and topped with fluffy whipped cream, chocolate shavings, and chopped pecans. A delightful treat that will satisfy any chocolate lover’s cravings!
Ingredients
Crust
- 1 1/3 cups graham cracker crumbs
- 5 tablespoons unsalted butter, room temperature
- 1/4 cup granulated sugar
Filling
- 2/3 cup + 2 tablespoons granulated sugar, divided
- 1/8 teaspoon salt
- 5 tablespoons flour
- 1 3/4 squares unsweetened chocolate
- 12 ounces evaporated milk or 1/2 cup heavy whipping cream (1 can)
- 2 large egg yolks, lightly beaten
- 2 cups small marshmallows
- 1/4 cup unsalted butter
- 1 cup heavy whipping cream
- Semisweet chocolate for grating
- 2 tablespoons chopped pecans
Instructions
- Make Crust – Preheat oven to 375 degrees F. Combine graham cracker crumbs, butter, and sugar. Press into a pie plate and bake for 8 minutes. Cool.
- Make Filling – Combine sugar, salt, and flour in a saucepan. Add melted chocolate, milk/cream, and egg yolks. Cook, whisking, until thickened. Stir in butter and marshmallows. Cool. Fill crust with custard.
- …
Notes
- You will also need: small and medium mixing bowls, 9-inch pie plate or dish, small saucepan, whisk, electric mixer, spatula, grater
- This recipe was tested with both regular marshmallows and kosher marshmallows. Both results were delicious, so feel free to use kosher marshmallows if you prefer.
Nutrition
- Serving Size: 1 slice
- Calories: 382kcal
- Sugar: 16g
- Sodium: 160mg
- Fat: 27g
- Saturated Fat: 15g
- Unsaturated Fat: 9g
- Trans Fat: 0g
- Carbohydrates: 30g
- Fiber: 1g
- Protein: 5g
- Cholesterol: 106mg


