

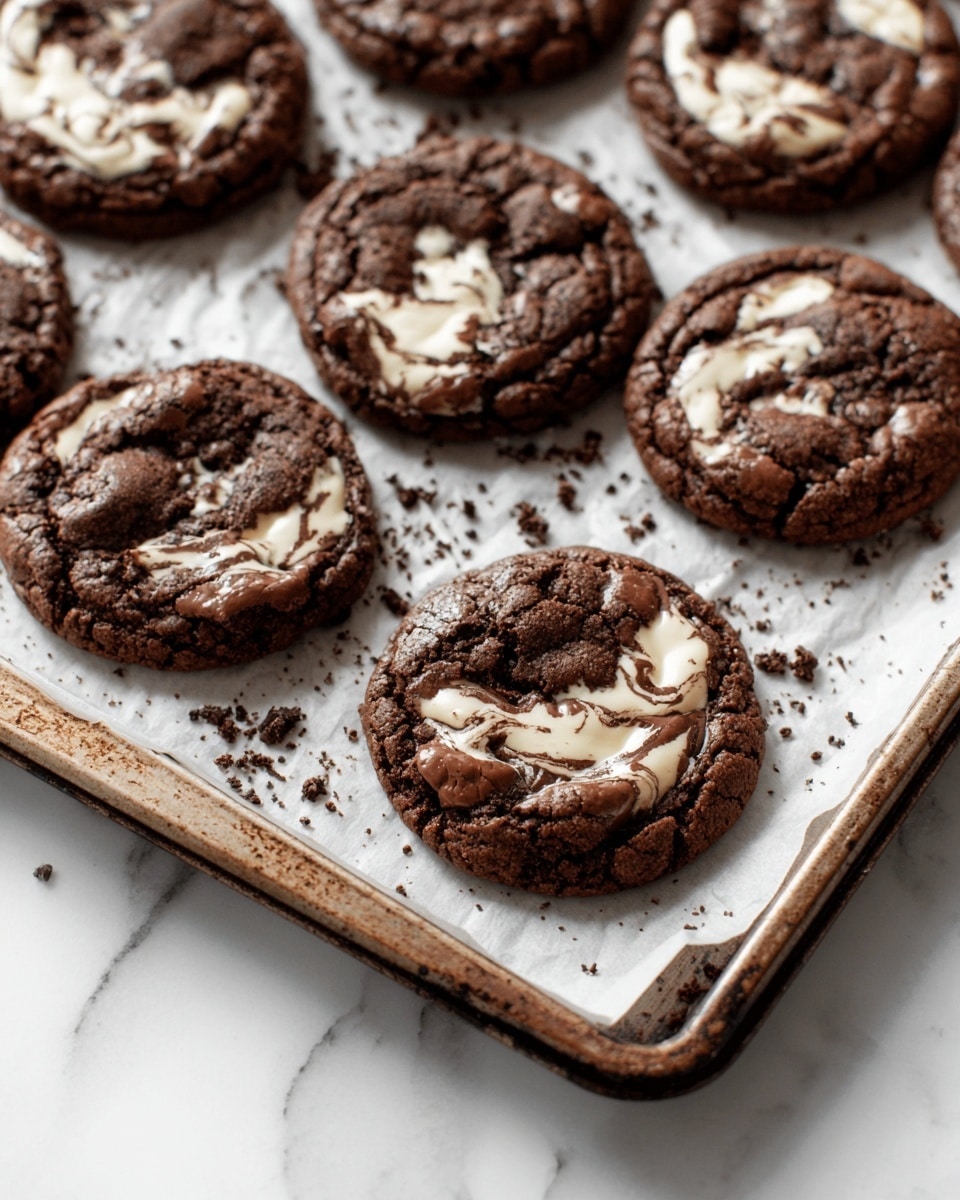
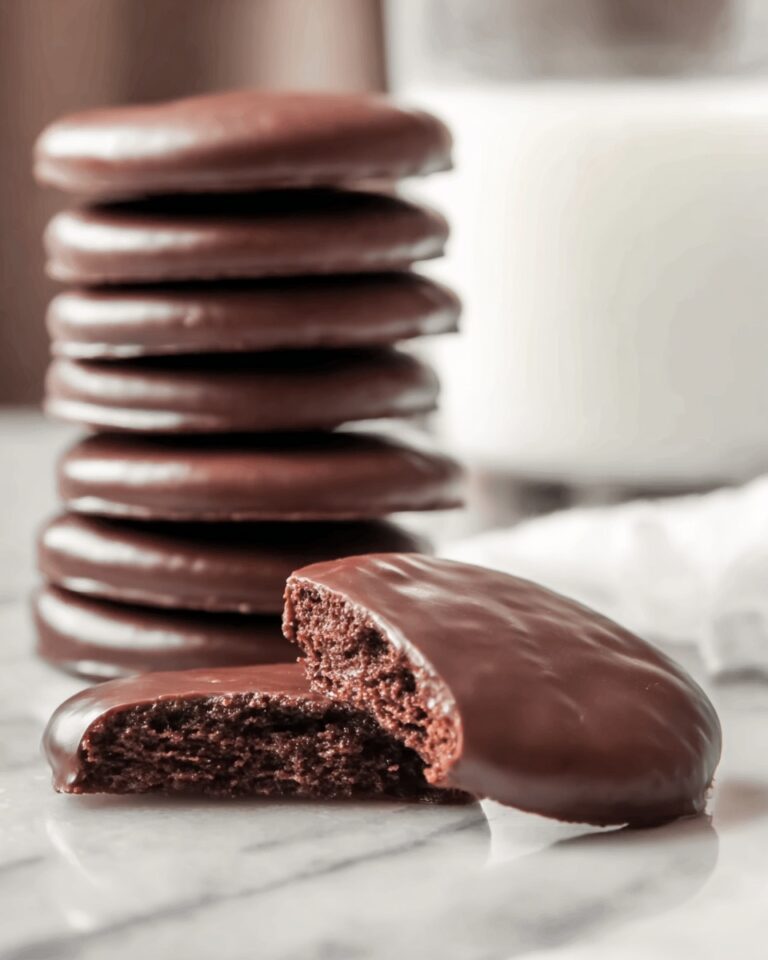
I absolutely love how this Chocolate Marshmallow Swirl Cookies Recipe blends rich cocoa with soft, gooey marshmallow in every bite. The moment you bite into one, you get that perfect combination of deep chocolate flavor and a sweet, fluffy marshmallow surprise that just melts in your mouth. Whether you’re baking for a cozy night in or bringing a crowd-pleaser to a gathering, these cookies always impress.
When I first tried this recipe, I was hooked by how easy it was to get that swirl effect without a fancy technique. You’ll find that the marshmallow fluff adds such a fun texture and sweetness that’s a beautiful contrast to the dense chocolate dough. The best part? This recipe is forgiving, making it perfect for both beginner bakers and those looking to jazz up their cookie game with something special.
Why You’ll Love This Recipe
- Delicious Flavor Combo: The rich chocolate pairs perfectly with sweet, melty marshmallow for an irresistible treat.
- Fun and Easy Technique: Swirling marshmallow fluff into the dough gives a stunning effect without extra effort.
- Great for Any Occasion: These cookies make perfect cozy snacks, party treats, or even gifts for loved ones.
- Beginner Friendly: Simple steps that result in bakery-quality cookies you’ll be proud to share.

Ingredients You’ll Need
Each ingredient here plays an important role in making these Chocolate Marshmallow Swirl Cookies come alive – from cocoa powder for intense chocolate flavor to marshmallow fluff for that decadent swirl. When shopping, I recommend using good-quality cocoa and fresh eggs for the best results.
- All-purpose flour: The base for your cookies, it gives structure without weighing them down.
- Unsweetened cocoa powder: Adds deep, rich chocolate flavor; I like Dutch-processed for smoother taste.
- Baking soda: Helps the cookies rise just right for a tender crumb.
- Salt: Balances sweetness and enhances chocolate’s depth.
- Unsalted butter: Use softened butter to cream easily and build a fluffy dough.
- Granulated sugar: Sweetens and helps with that slight crisp edge on the cookies.
- Eggs: Room temperature eggs blend in better and add richness.
- Vanilla extract: I always use pure vanilla for that warm, inviting aroma.
- Marshmallow fluff: The star swirl ingredient — use the classic fluff for that iconic gooey texture.
Variations
I love playing around with this Chocolate Marshmallow Swirl Cookies Recipe to fit whatever mood I’m in or who I’m baking for. You can easily tweak it to make it gluten-free, pack in some nuts, or add seasonal twists that make the recipe feel brand new every time.
- Use real marshmallows instead of fluff: I’ve swapped in mini marshmallows melted and swirled into the dough for a chunkier texture, and it adds a delightful chewiness.
- Add chopped nuts: Pecans or walnuts add a lovely crunch that contrasts nicely with the soft marshmallow and chocolate.
- Make them gluten-free: Try using a gluten-free flour blend—just keep an eye on dough texture and adjust with a bit more flour or butter if needed.
- Seasonal twists: Stir in a pinch of cinnamon or orange zest for a festive flavor that’s perfect around the holidays.
How to Make Chocolate Marshmallow Swirl Cookies Recipe
Step 1: Mix your dry ingredients thoroughly
Begin by whisking together the all-purpose flour, unsweetened cocoa powder, baking soda, and salt in a medium bowl. This step might seem simple, but it’s key to ensure your cocoa and leavening agents are evenly distributed. Trust me, I’ve seen cookies come out lopsided when this was skipped. Set this bowl aside while you move on to creaming your butter and sugar.
Step 2: Cream the butter and sugar until fluffy
Using an electric mixer, beat your room-temperature unsalted butter with the granulated sugar until the mixture is light, fluffy, and pale in color—this usually takes about 3-4 minutes. The air incorporated here is what gives your cookies that tender, melt-in-your-mouth crumb. If you rush this step, you’ll not get those perfect textures.
Step 3: Add eggs and vanilla the right way
Beat in the eggs one at a time, making sure each is well incorporated before adding the next. This helps the eggs blend seamlessly and avoids breaking down the batter. Then stir in the vanilla extract, which brings a lovely warmth that complements the cocoa beautifully.
Step 4: Combine wet and dry ingredients gently
Gradually add your dry mix into the wet ingredients, mixing on low speed just until the dough comes together. Overmixing here can make your cookies tough, so stop as soon as you don’t see streaks of flour. If you want, you can swirl the marshmallow fluff in now or wait until after chilling the dough—both work great, and I’ll share my favorite method next.
Step 5: Chill the dough – it’s a game changer
Wrap your dough and refrigerate it for at least an hour. I discovered this trick when my cookies were spreading too thin before, and chilling helps the dough firm up so you get thick, gooey centers instead of flat disks. It also makes the dough way easier to handle when shaping.
Step 6: Shape and swirl in marshmallow fluff
Scoop chilled dough into balls and place them spaced about 2 inches apart on parchment-lined baking sheets. Press a small well into each ball and spoon about a teaspoon of marshmallow fluff into it. Using a toothpick or skewer, gently swirl the marshmallow into the cookie dough in pretty, random patterns. If you want an extra gooey experience, try adding a bit more fluff on top halfway through baking — that’s a little secret I love to use for special treats.
Step 7: Bake and cool to perfection
Bake at 350°F (175°C) for 10-12 minutes until the edges are set but the centers remain soft — they’ll continue cooking a bit as they cool. Let the cookies rest on the pans for 5 minutes before moving them to a wire rack. This helps the marshmallow set slightly and makes the cookies easier to handle without losing any of that melty goodness.
Pro Tips for Making Chocolate Marshmallow Swirl Cookies Recipe
- Chill Your Dough Thoroughly: I used to rush this step, but chilling really keeps the cookies from spreading too thin and improves texture.
- Swirl Gently: Use a toothpick to swirl marshmallow fluff carefully—too much mixing can lose that beautiful swirl effect.
- Rotate Baking Sheets: Turning your pans halfway through baking ensures even cooking and consistent results.
- Use Room Temperature Eggs: This simple step helps your eggs blend smoothly into butter and sugar, preventing lumps.
How to Serve Chocolate Marshmallow Swirl Cookies Recipe
Garnishes
I personally like to dust these cookies lightly with powdered sugar just before serving — it adds a lovely snowy contrast to the dark chocolate and gives a hint of extra sweetness without overpowering the marshmallow. Sometimes, I’ve also sprinkled a pinch of flaky sea salt on top to balance the sweetness, which my family especially enjoys.
Side Dishes
These cookies pair wonderfully with a cold glass of milk or a mug of hot cocoa for a cozy treat. If you’re serving after dinner, a scoop of vanilla ice cream or even some fresh berries on the side contrasts nicely with the rich chocolate. For a festive touch, I like offering peppermint tea or spicy chai alongside.
Creative Ways to Present
For birthday parties or holiday gatherings, try stacking these cookies in a tiered jar layered with mini marshmallows and decorative ribbons. I once wrapped a bundle of cookies in clear cellophane tied with a twine bow, and they made adorable homemade gifts. You can also plate them on a festive tray with sprigs of fresh mint or dusted cocoa powder shapes for a beautiful, edible centerpiece.
Make Ahead and Storage
Storing Leftovers
After cooling completely, I store leftover cookies in an airtight container at room temperature. This keeps them soft and moist for up to 4 days, though honestly, they rarely last that long around here! If you notice marshmallow sticking a bit, placing parchment paper between layers helps prevent that tacky mess.
Freezing
If you want to make these ahead on a larger scale, freezing shaped dough balls works like a charm. I wrap them tightly in plastic wrap, then place in a freezer bag. When ready to bake, just add 2-3 minutes to your baking time and bake directly from frozen. This way, you can enjoy freshly baked cookies anytime.
Reheating
To warm leftovers, pop a cookie in the microwave for about 10-15 seconds. This softens the marshmallow and revives that melty texture nicely. Just be careful not to overheat or they can get a bit rubbery. Alternatively, a few minutes in a low-temperature oven works well if you prefer less moisture.
FAQs
-
Can I use regular marshmallows instead of marshmallow fluff in this recipe?
Absolutely! You can melt down mini marshmallows or chop up jumbo marshmallows and swirl them into the batter. Keep in mind that marshmallow fluff tends to melt more evenly and creates a smoother swirl, while marshmallows add a chunkier texture but still keep that gooey goodness.
-
How do I prevent the marshmallow from burning while baking?
To avoid burning, make sure you add the marshmallow fluff after the dough is partly chilled and only swirl gently. If you want more gooey marshmallow on top, add it halfway through baking rather than all at once. Also, keeping the oven at the recommended 350°F helps prevent scorching.
-
Why do my cookies spread too much and get flat?
This usually happens when the dough is too warm or hasn’t been chilled enough. Chilling the dough for at least an hour solidifies the fat and slows spreading, which results in thicker, softer cookies. Also, make sure you’re measuring your flour correctly to avoid too little flour in the mix.
-
Can I make this recipe vegan or dairy-free?
Yes, you can substitute dairy-free butter and use a vegan egg replacer like flax eggs or commercial egg substitutes. For marshmallow, look for vegan marshmallow fluff alternatives or melt vegan marshmallows. Just note that texture and flavor may vary slightly, but it’s a tasty option!
Final Thoughts
This Chocolate Marshmallow Swirl Cookies Recipe has become one of my go-to favorites whenever I want something that feels like a special treat but is still super approachable to make. I love how the gooey marshmallow adds that element of fun and surprise in every bite. If you want a dessert that’s both comforting and a little bit magical, I can’t recommend baking these enough — they’ll quickly become a beloved classic in your kitchen, just like they are in mine.
Print
Chocolate Marshmallow Swirl Cookies Recipe
- Prep Time: 20 minutes
- Cook Time: 30 minutes
- Total Time: 50 minutes
- Yield: 24 cookies
- Category: Dessert
- Method: Baking
- Cuisine: American
Description
These Chocolate Marshmallow Swirl Cookies combine rich cocoa flavor with sweet, gooey marshmallow swirls for a delightful treat. Perfectly soft and chewy with a lightly crisp edge, these cookies are easy to make and ideal for chocolate lovers seeking a fun twist on classic cookies.
Ingredients
Dry Ingredients
- 2 cups all-purpose flour
- 3/4 cup unsweetened cocoa powder
- 1/2 teaspoon baking soda
- 1/4 teaspoon salt
Wet Ingredients
- 1 cup unsalted butter, room temperature
- 1 1/2 cups granulated sugar
- 2 large eggs, room temperature
- 2 teaspoons vanilla extract
- 1 cup marshmallow fluff
Instructions
- Mix Dry Ingredients: In a medium bowl, whisk together 2 cups all-purpose flour, ¾ cup unsweetened cocoa powder, ½ teaspoon baking soda, and ¼ teaspoon salt. Set aside.
- Cream Butter and Sugar: In a large mixing bowl, use an electric mixer to cream 1 cup room temperature unsalted butter with 1½ cups granulated sugar until light and fluffy, about 3-4 minutes.
- Add Eggs and Vanilla: Beat in 2 large room-temperature eggs one at a time, ensuring each is fully incorporated before adding the next. Stir in 2 teaspoons vanilla extract.
- Combine Wet and Dry: Gradually add the dry ingredients to the wet mixture, mixing on low speed just until the dough comes together. Avoid overmixing. You can lightly swirl the marshmallow fluff at this point or wait until after chilling the dough.
- Chill the Dough: Cover the dough and refrigerate for at least 1 hour to make it easier to handle and to prevent excessive spreading during baking.
- Preheat Oven: About 20 minutes before baking, preheat your oven to 350°F (175°C). Prepare two baking sheets with parchment paper or silicone baking mats.
- Form Cookies: Use a cookie scoop or tablespoon to scoop out chilled dough and roll into balls. Place on prepared baking sheets, spacing about 2 inches apart. Press a small indent in the center and spoon a teaspoon of marshmallow fluff into each. Use a toothpick to swirl the marshmallow into the cookie.
- Bake: Bake in the preheated oven for 10-12 minutes, until edges are set but centers remain soft. Optionally, add a bit more fluff on top halfway through baking for extra gooeyness.
- Cool on Pan: Let cookies cool on the baking sheet for 5 minutes before transferring them to a wire rack to cool completely. This helps the marshmallow set slightly and makes cookies easier to handle.
Notes
- If the dough is too sticky, chilling it for 30 minutes before shaping improves handling.
- Marshmallow fluff melts more than real marshmallows; use melted marshmallows for a fluffier swirl.
- Add a jumbo marshmallow to the cookie center as an alternative to the swirl.
- Rotate baking sheets halfway through baking for even cooking.
- Store baked cookies in an airtight container at room temperature to maintain freshness.
- Freeze shaped dough balls for later baking; add a couple of minutes to baking time when baking from frozen.
Nutrition
- Serving Size: 1 cookie
- Calories: 184
- Sugar: 15g
- Sodium: 59mg
- Fat: 8g
- Saturated Fat: 5g
- Unsaturated Fat: 3g
- Trans Fat: 0g
- Carbohydrates: 25g
- Fiber: 1g
- Protein: 2g
- Cholesterol: 36mg
