
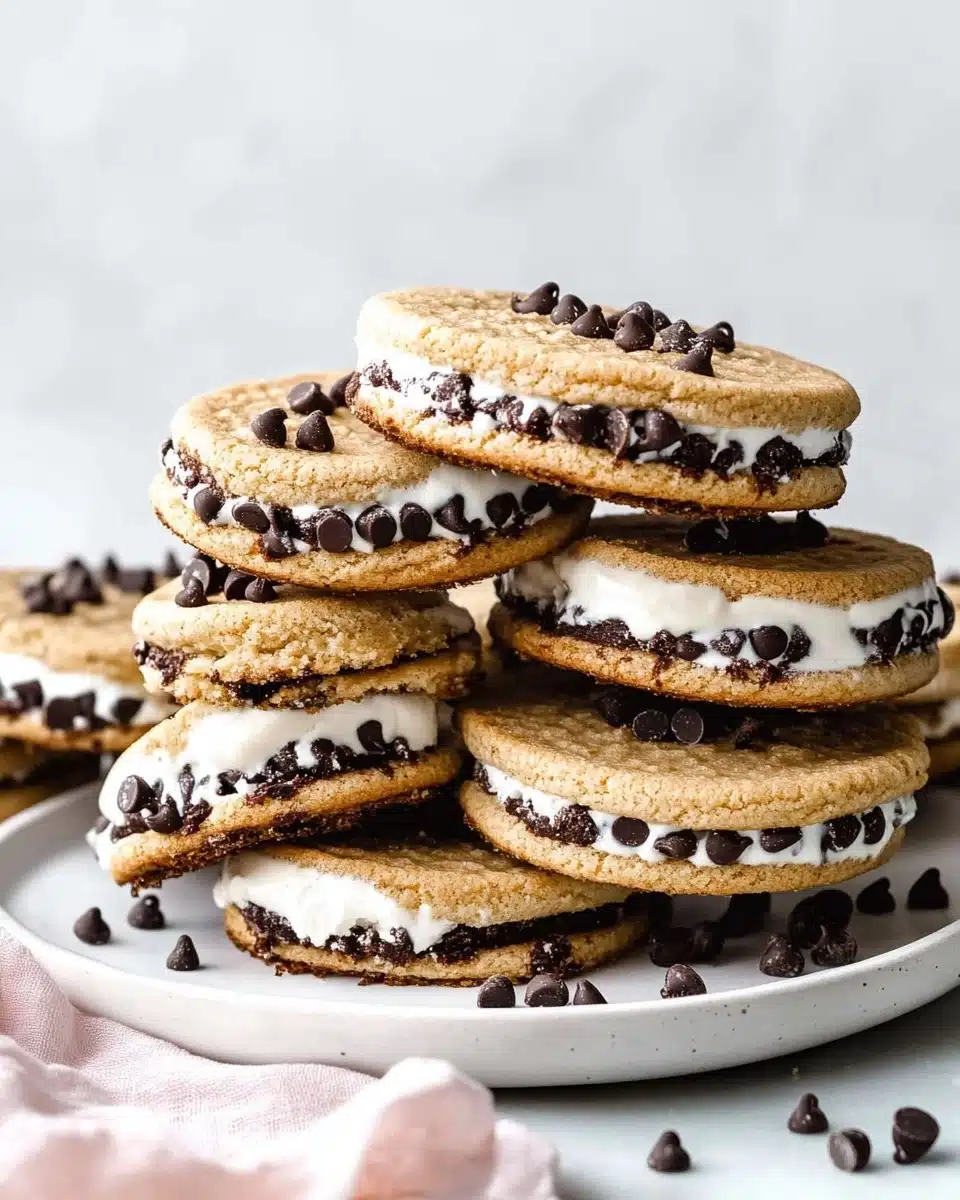
Let’s talk about pure nostalgia and summer fun—Cookie Ice Cream Sandwiches are, hands down, one of the greatest treats in dessert history. Thick, chewy homemade chocolate chip cookies hugging creamy, dreamy ice cream and rolled in whatever toppings your heart desires. Whether you serve these at a backyard gathering or treat yourself after a long day, Cookie Ice Cream Sandwiches are guaranteed joy in every single bite.
Why You’ll Love This Recipe
- Chewy Yet Soft Cookies: The unique combo of cornstarch and an extra egg yolk creates the perfect cookie texture—sturdy for sandwiching, but soft enough to bite through, even when frozen.
- Customizable to the Max: You can mix and match absolutely everything, from the ice cream flavors to the rolling toppings; every batch becomes your own signature creation.
- Kid (and Grown-up!) Friendly: These Cookie Ice Cream Sandwiches are just as much fun to assemble as they are to eat—get the whole family involved in building them.
- Make-Ahead Magic: Prep them in advance for parties, holidays, or simply because you want a stash of happiness waiting in your freezer.

Ingredients You’ll Need
There’s magic in how just a handful of classic ingredients come together for truly show-stopping Cookie Ice Cream Sandwiches. Each ingredient plays a key role in building structure, flavor, and that irresistible bite you love in both the cookies and the filling.
- All-purpose flour: This is the backbone, giving the cookies their classic chew and supporting all those mix-ins and ice cream layers.
- Cornstarch: Just a touch ensures your cookies stay tender, even right out of the freezer.
- Baking soda: Helps the cookies rise and stay soft without spreading too thin.
- Salt: Brings out the flavor and balances the sweetness—don’t skip it.
- Unsalted butter (softened): Adds rich flavor and the ideal melt-in-your-mouth texture; room temperature is key for creamy blending.
- Light or dark brown sugar: Brown sugar isn’t just for sweetness—it lends a caramelized depth and extra chewiness.
- Granulated sugar: For crispy edges and balanced sweetness throughout.
- Large egg + 1 extra yolk: That extra yolk is the secret for rich, soft cookies that won’t turn into hockey pucks in the freezer!
- Pure vanilla extract: Infuses the cookies with cozy, rounded flavor in every bite.
- Mini semi-sweet chocolate chips: Tiny chips are gentler on your teeth when frozen—and pack tons of chocolate into each bite.
- Vanilla ice cream (or any flavor you adore): Creamy ice cream is the center of the sandwich; pick your favorite or experiment with wild flavors.
- Mini chocolate chips, sprinkles, or finely chopped nuts: A fun, crunchy coating for the sandwich edges—let everyone choose their favorite!
Variations
Part of the endless appeal of Cookie Ice Cream Sandwiches is how easy they are to personalize. Switch up the flavors or swap in alternatives for dietary needs—this recipe is an open invitation to get creative!
- Gluten-Free Cookies: Use a favorite flourless almond butter or peanut butter chocolate cookie recipe for a gluten-free makeover—just double check your ice cream, too.
- Flavor Mash-Up: Try chocolate ice cream, strawberry, cookies & cream, or even salted caramel for the ice cream layer—the options are endless.
- Allergen-Friendly: Sub in dairy-free ice cream or a plant-based butter in the cookie dough for a treat everyone can enjoy.
- Toppings Galore: Coat the edges with crushed pretzels, freeze-dried fruit pieces, coconut flakes, or mini candies for fun colors and textures.
How to Make Cookie Ice Cream Sandwiches
Step 1: Make the Cookie Dough
Start by whisking together your dry ingredients—flour, cornstarch, baking soda, and salt—to ensure they’re evenly distributed. Then, cream the softened butter with both sugars until light and fluffy. Add the egg, extra yolk, and vanilla for that richness and depth, scraping down the bowl as needed. Gradually beat in the dry mixture and finish with the mini chocolate chips. The dough will be temptingly soft and sticky—just right.
Step 2: Scoop and Bake the Cookies
Line your baking sheets and use a medium cookie scoop to portion the dough into evenly sized balls (about 1.5 tablespoons each). Space them well so they don’t spread into each other. Bake at 350°F for 12–13 minutes, keeping an eye out for lightly browned edges and soft centers. Let them set on the baking sheet for five minutes, then move to a wire rack—cool cookies make the best ice cream sandwiches!
Step 3: Assemble Your Cookie Ice Cream Sandwiches
Once the cookies are fully cooled, it’s assembly time. Place a generous scoop of your favorite ice cream on the flat side of one cookie, then top with another cookie. Gently press to spread the ice cream out to the edges. Roll the sides in your toppings of choice—mini chips, sprinkles, or nuts—for color and crunch. If not eating right away, wrap each sandwich individually and freeze until firm.
Step 4: Freeze and Enjoy!
If you can resist immediately devouring your Cookie Ice Cream Sandwiches, freezing them for at least 3 hours is the secret for neat, perfect treats that hold together beautifully. When you’re ready, unwrap and dig in—the ultimate cool treat for any occasion.
Pro Tips for Making Cookie Ice Cream Sandwiches
- Chill Those Cookies: Be sure your cookies are completely cooled (or even slightly chilled in the fridge) before adding ice cream to prevent any melting chaos during assembly.
- Scoop Smart: Use a sturdy ice cream scoop and work quickly—even 2-3 minutes on the counter makes the ice cream much easier to manage for perfect sandwich layers.
- Uniform Sizing: Pair cookies similar in size and shape for sandwiches that look bakery-worthy and are easy to eat.
- Freeze Before Serving: For clean, crisp bites, let assembled sandwiches firm up in the freezer for a few hours—you’ll love the difference it makes.
How to Serve Cookie Ice Cream Sandwiches

Garnishes
The true fun comes with those finishing touches: roll the sides in extra mini chocolate chips for double the chocolate, rainbow sprinkles for birthday vibes, or finely chopped roasted nuts for a nutty crunch. For something extra special, a light dusting of sea salt flakes over the top can be a delicious contrast, too.
Side Dishes
Cookie Ice Cream Sandwiches honestly shine on their own, but if you’re hosting a party or summertime feast, serve them alongside a fresh fruit salad or a bubbly pitcher of lemonade. A bowl of salty popcorn is an unexpectedly delightful companion if you love a sweet-and-salty pairing!
Creative Ways to Present
Turn your Cookie Ice Cream Sandwiches into a centerpiece: stack them high on a chilled platter, wrap each in parchment with a ribbon for party favors, or set up a DIY bar with bowls of toppings so everyone can decorate their own creation. For kids’ parties, try “mini” versions or cut sandwiches in halves or quarters to make an irresistible dessert platter.
Make Ahead and Storage
Storing Leftovers
If you’re lucky enough to have leftovers, wrap each sandwich tightly in plastic wrap or parchment paper and stash them in an airtight container in your freezer. They’ll keep that freshly-made taste and stay mess-free for whenever the craving strikes.
Freezing
These Cookie Ice Cream Sandwiches are a make-ahead dream! Once they’re assembled, freeze them for at least 3 hours—this firms up the ice cream and melds the cookies and filling together for the best texture. With proper wrapping, they’ll stay delicious for up to 3 months, ready anytime you need a cool treat.
Reheating
No actual reheating needed (bonus!), but if your sandwiches are frozen solid, let them sit at room temperature for about 5 minutes before serving. This brings the cookies back to that soft-chewy texture and allows the ice cream to become perfectly creamy again.
FAQs
-
Can I make Cookie Ice Cream Sandwiches ahead of time?
Absolutely! You can bake the cookies up to 3 days in advance and store them in an airtight container at room temperature. Once assembled, the sandwiches freeze beautifully for up to 3 months—perfect for planning ahead or prepping for parties.
-
What’s the best way to keep ice cream from melting during assembly?
Work quickly with chilled cookies and firm ice cream. If your kitchen is warm or you want to prep a lot at once, keep the assembled sandwiches in the freezer as you go, wrapping each one before moving on to the next.
-
Can I use different types of cookies for the sandwiches?
Definitely! The classic chocolate chip cookie is a favorite, but oatmeal, peanut butter, or even double chocolate cookies make fantastic substitutes. Just choose a cookie that’s soft and chewy for the best texture when frozen.
-
How do I keep my Cookie Ice Cream Sandwiches from getting too hard in the freezer?
The key is the extra egg yolk and cornstarch in the cookie dough, keeping the cookies tender even when frozen. Let the sandwiches thaw at room temperature for a few minutes before eating, and avoid freezing them uncovered to prevent freezer burn.
Final Thoughts
Cookie Ice Cream Sandwiches are the kind of pure, hands-on dessert joy that everyone should experience. Customize, freeze, and smile—these sweet sandwiches are a memory-maker with every bite. I can’t wait for you to gather your friends, family, and favorite ice cream flavors, and dive into a batch of homemade magic. Enjoy!
Print
Cookie Ice Cream Sandwiches Recipe
- Prep Time: 30 minutes
- Cook Time: 13 minutes
- Total Time: 3 hours, 30 minutes (includes freezing)
- Yield: 12 3-inch sandwiches 1x
- Category: Baking
- Method: Oven
- Cuisine: American
Description
Indulge in these delicious homemade cookie ice cream sandwiches that are perfect for a sweet treat or dessert. Soft and chewy cookies filled with creamy ice cream and your choice of toppings make for a delightful frozen treat.
Ingredients
For the Cookies:
- 2 and 1/4 cups (281g) all-purpose flour (spooned & leveled)
- 1 and 1/2 teaspoons cornstarch
- 1 teaspoon baking soda
- 1/2 teaspoon salt
- 3/4 cup (12 Tablespoons; 170g) unsalted butter, softened to room temperature
- 3/4 cup (150g) packed light or dark brown sugar
- 1/2 cup (100g) granulated sugar
- 1 large egg + 1 egg yolk, at room temperature
- 2 teaspoons pure vanilla extract
- 1 and 1/4 cups (225g) mini semi-sweet chocolate chips
Sandwiching:
- 3 cups (about 540g) vanilla ice cream (or your desired flavor)
- 1 cup mini chocolate chips (180g), sprinkles (150g), or finely chopped nuts (100g)
Instructions
- Preheat oven and prepare baking sheets: Preheat oven to 350°F (177°C) and line 3 large baking sheets with parchment paper or silicone baking mats.
- Prepare dry ingredients: In a medium bowl, whisk together flour, cornstarch, baking soda, and salt.
- Mix cookie dough: Using a mixer, beat butter and sugars until creamy. Add eggs and vanilla, then mix in dry ingredients and chocolate chips.
- Bake cookies: Scoop dough onto baking sheets and bake for 12-13 minutes until lightly browned.
- Assemble sandwiches: Place a scoop of ice cream on a cookie, top with another cookie, gently press together, and roll the edges in toppings.
- Freeze: Wrap sandwiches and freeze for at least 3 hours or up to 3 months.
Notes
- Prepare cookies ahead of time for convenience.
- Use mini chocolate chips for a better texture when frozen.
- No need to soften ice cream before assembling sandwiches.
Nutrition
- Serving Size: 1 sandwich
- Calories: Approximately 320
- Sugar: 25g
- Sodium: 180mg
- Fat: 18g
- Saturated Fat: 11g
- Unsaturated Fat: 6g
- Trans Fat: 0g
- Carbohydrates: 38g
- Fiber: 2g
- Protein: 4g
- Cholesterol: 50mg


