

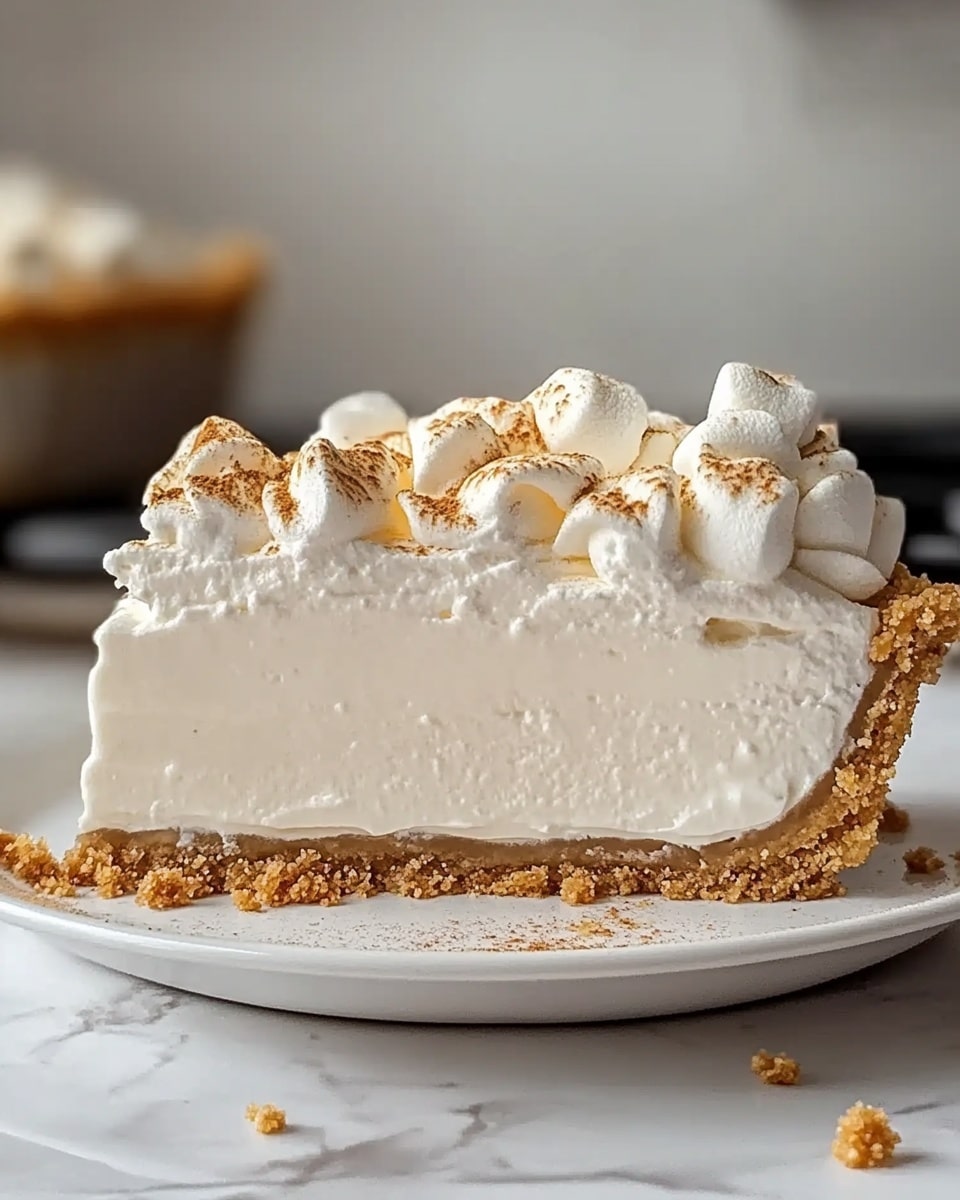
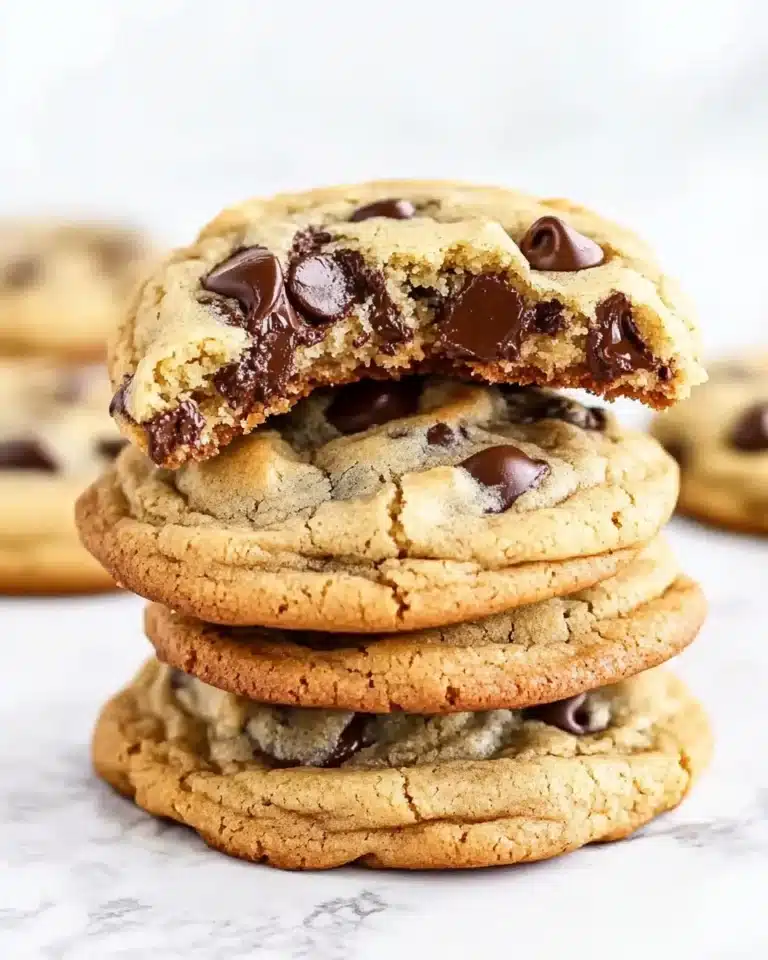
I absolutely love how this Marshmallow Whip Cheesecake: No-Bake Dream Dessert Recipe comes together—it’s like a fluffy, dreamy cloud of sweet goodness that requires zero oven time. Whether I’m craving something indulgent after dinner or need a show-stopping dessert for a get-together, this no-bake cheesecake always steals the spotlight effortlessly.
When I first tried this recipe, I was amazed by how the marshmallow fluff blends so perfectly with cream cheese and whipped topping to create a light yet rich texture. You’ll find that it’s a total crowd-pleaser, and it’s ideal for those warmer days when firing up the oven isn’t an option. Trust me, once you try this Marshmallow Whip Cheesecake: No-Bake Dream Dessert Recipe, it will become your go-to for any occasion.
Why You’ll Love This Recipe
- Effortless Preparation: No oven needed, making it perfect for hot days or speedy dessert fixes.
- Light, Fluffy Texture: The marshmallow fluff adds a unique airy sweetness you won’t find in regular cheesecakes.
- Versatile Toppings: Easily customize with berries, chocolate, or extra marshmallows for any season or crowd.
- Family Favorite: My crew goes wild over it every time — and I bet yours will, too!

Ingredients You’ll Need
These ingredients come together in a way that’s simple yet delicious, with pantry staples and a couple of special treats to make this cheesecake truly magical.
- Graham cracker crumbs: The perfect crunchy base that complements the fluffy filling; pre-crushed packs save time.
- Granulated sugar: Balances sweetness in the crust for that classic graham texture.
- Unsalted butter: Melted to bind the crust ingredients together beautifully.
- Cream cheese: Softened to ensure smooth, creamy filling without lumps.
- Marshmallow fluff: Adds that signature airy, sweet texture that sets this cheesecake apart.
- Vanilla extract: A little dash elevates the flavors, making every bite taste richer.
- Whipped topping (like Cool Whip): Lightens the cream cheese and marshmallow combo for a dreamy finish.
- Optional toppings: Fresh berries, mini marshmallows, chocolate shavings, or crushed grahams to make it look and taste extra special.
Variations
I love making this recipe my own depending on the season or who I’m serving it to—don’t be shy about trying your own twists, you might discover a new favorite! Here are some of my tried-and-true variations that add flair and flavor.
- Lemon Zest Twist: I add a teaspoon of fresh lemon zest to the filling for a lovely citrusy brightness that brightens up the creaminess.
- Berry Swirl: Before chilling, swirl in some raspberry or strawberry jam—it creates beautiful marbling and bursts of fruity goodness.
- Chocolate Cookie Crust: Swap graham crumbs for crushed Oreos—my kids adore this one for a decadent chocolate base.
- Mini Cheesecakes: Use cupcake liners and a muffin tin to make personal-sized treats—for parties, they’re a total hit.
- Nutty Upgrade: Sprinkle some chopped toasted pecans or almonds on top for a satisfying crunch contrast.
How to Make Marshmallow Whip Cheesecake: No-Bake Dream Dessert Recipe
Step 1: Crafting the Perfect Crust
Start by mixing the graham cracker crumbs and sugar in a medium bowl—this combo forms the foundation of your dessert. Melt the butter and stir it in until everything looks evenly moistened and crumbly. Press this mixture firmly into the bottom of a 9-inch springform pan; using the bottom of a glass or measuring cup helps compact it nicely. Toss your crust in the fridge to chill while you whip up the filling—this helps it set up firm so it holds the creamy topping beautifully.
Step 2: Whipping Up the Cheesecake Filling
In a large mixing bowl, beat softened cream cheese until it’s smooth and fluffy—this step is key for a luscious texture without lumps. Next, add in the marshmallow fluff and vanilla extract; mix until the filling looks silky and combined. Finally, gently fold in the whipped topping with a spatula—don’t rush this part, you want to keep all that light, airy goodness intact. This fluffy filling is what makes this cheesecake a no-bake dream come true.
Step 3: Bringing It All Together
Spread the cheesecake filling evenly over the chilled crust, smoothing the top with a spatula for a clean finish. Cover tightly with plastic wrap to prevent any fridge odors from sneaking in. Refrigerate the whole cheesecake for at least 4 hours—overnight is best because it allows everything to firm up beautifully, making slicing a breeze when you’re ready to serve.
Step 4: Garnishing and Serving Your Dream Dessert
Right before serving, go wild with toppings! My favorites are fresh berries for a pop of color and tartness, mini marshmallows for playful texture, or a drizzle of warm chocolate sauce for extra indulgence. Carefully release the springform pan’s ring—this always feels like a mini victory—and slice up to serve chilled. Watching those first bites vanish is one of my favorite kitchen moments.
Pro Tips for Making Marshmallow Whip Cheesecake: No-Bake Dream Dessert Recipe
- Soften Your Cream Cheese Thoroughly: When your cream cheese is perfectly softened, your filling becomes silky smooth—no lumps or graininess.
- Don’t Overfold the Whipped Topping: Gently fold it in to keep the airiness, which is critical for that light texture.
- Press the Crust Firmly: Pressing tightly into the pan keeps it from crumbling when you slice the cheesecake.
- Chill Time is Your Friend: Refrigerate long enough for all the flavors to meld and the texture to set perfectly—overnight if you can.
How to Serve Marshmallow Whip Cheesecake: No-Bake Dream Dessert Recipe
Garnishes
I’m a big fan of keeping it simple with a handful of fresh berries—strawberries, blueberries, or raspberries are my go-to for freshness and a little tart bite. Mini marshmallows on top add a fun, playful look and a sweet chew. Once in a while, I sprinkle chocolate shavings or drizzle warm chocolate sauce for a touch of elegance that makes it party-ready.
Side Dishes
This cheesecake pairs beautifully with light sides like a fresh fruit salad or a simple mint tea. If you’re serving a larger meal, I love offering something citrusy on the side like a lemon sorbet to balance the dessert’s sweetness.
Creative Ways to Present
For special occasions, I like to serve this cheesecake in individual glass jars or mason jars layered with crushed graham crackers and berry compote—so cute and incredibly easy to personalize. You could also make mini versions in cupcake liners for a fun party platter that’s mess-free and perfect for little hands.
Make Ahead and Storage
Storing Leftovers
I store leftovers in the fridge covered tightly with plastic wrap to keep the cheesecake moist and prevent it from picking up fridge smells. In my experience, it keeps well for up to 4 days—after that, the texture starts to lose its signature fluffiness.
Freezing
Freezing this cheesecake works surprisingly well—I wrap it tightly in plastic wrap and then aluminum foil to avoid freezer burn. When I’m ready to enjoy, I thaw it overnight in the fridge and it retains most of its creamy texture, though it’s best eaten within a month.
Reheating
This dessert is best served chilled, so I don’t reheat it. If you want to soften it a bit, letting it sit at room temperature for 15-20 minutes before serving works like a charm to bring out flavors without losing texture.
FAQs
-
Can I use a different crust instead of graham crackers?
Absolutely! You can swap the graham cracker crumbs for crushed chocolate cookies, Oreos, or even nuts if you prefer. Just be sure to use melted butter to bind your base well, and press it firmly into the pan to prevent crumbling.
-
Is it necessary to chill the cheesecake overnight?
While chilling for 4 hours is the minimum, I highly recommend overnight chilling if you have time. This extra time lets the flavors meld and the filling firm up perfectly for clean slicing and the best texture.
-
Can I make this recipe dairy-free or vegan?
With some substitutions like dairy-free cream cheese, vegan marshmallow fluff, and plant-based whipped topping, you can adapt the recipe. Just expect some slight changes in texture and flavor, but it’s a fun experiment if you have dietary needs!
-
How long does this cheesecake last in the fridge?
Stored properly in an airtight container or wrapped tightly with plastic wrap, this cheesecake will stay fresh and delicious for up to 4 days.
-
Can I freeze leftovers?
Yes, freezing works well if you wrap the cheesecake well to prevent freezer burn. Thaw overnight in the fridge for best results, and consume within a month for optimal taste and texture.
Final Thoughts
This Marshmallow Whip Cheesecake: No-Bake Dream Dessert Recipe holds a special place in my kitchen because it combines simplicity with incredible flavor and texture. I love recommending it to friends who want to impress without stress—and honestly, it never fails to deliver smiles. Give it a try, and I’m sure this dreamy, fluffy cheesecake will become one of your most cherished desserts, too!
Print
Marshmallow Whip Cheesecake: No-Bake Dream Dessert Recipe
- Prep Time: 15 minutes
- Cook Time: 0 minutes
- Total Time: 4 hours 15 minutes
- Yield: 10 slices
- Category: Dessert
- Method: No-Cook
- Cuisine: American
- Diet: Vegetarian
Description
This no-bake Marshmallow Whip Cheesecake is a light and airy dessert featuring a crunchy graham cracker crust and a fluffy marshmallow cream cheese filling. Perfect for a dreamy, fuss-free treat, it’s topped with your choice of fresh berries, mini marshmallows, or chocolate drizzle for an extra indulgent touch.
Ingredients
For the Graham Cracker Crust:
- 1 1/2 cups graham cracker crumbs
- 1/3 cup granulated sugar
- 1/2 cup (1 stick) unsalted butter, melted
For the Cheesecake Filling:
- 16 oz cream cheese, softened
- 7 oz marshmallow fluff (1 jar)
- 1 tsp vanilla extract
- 1 container (8 oz) whipped topping (like Cool Whip), thawed
Optional Toppings:
- Fresh berries
- Mini marshmallows
- Chocolate shavings or drizzle
- Crushed graham crackers
Instructions
- Make the Crust:
In a medium bowl, combine graham cracker crumbs and sugar. Stir in the melted butter until the mixture is thoroughly combined. Press this mixture firmly into the bottom of a 9-inch springform pan to form an even layer. Chill in the refrigerator while preparing the filling to help set the crust.
- Prepare the Filling:
In a large mixing bowl, beat the softened cream cheese until smooth and fluffy. Add the marshmallow fluff and vanilla extract, mixing until well combined and creamy. Gently fold in the thawed whipped topping until the filling is light and airy.
- Assemble the Cheesecake:
Spread the cheesecake filling evenly over the chilled crust using a spatula. Smooth the top for a neat finish. Cover the pan with plastic wrap and refrigerate for at least 4 hours, preferably overnight, to allow the cheesecake to set firmly.
- Decorate and Serve:
Before serving, add your choice of toppings such as fresh strawberries, mini marshmallows, or a drizzle of chocolate sauce. Carefully remove the springform ring, slice the cheesecake into pieces, and serve chilled for a refreshing dessert.
Notes
- Crust swaps: Try chocolate wafer cookies or crushed Oreos for a different base.
- Flavor twists: Add lemon zest to the filling for a citrusy note, or swirl in raspberry jam before chilling.
- Make it mini: Use a muffin tin and cupcake liners to create individual cheesecakes.
Nutrition
- Serving Size: 1 slice
- Calories: 310 kcal
- Sugar: 18 g
- Sodium: 180 mg
- Fat: 22 g
- Saturated Fat: 12 g
- Unsaturated Fat: 8 g
- Trans Fat: 0.3 g
- Carbohydrates: 10 g
- Fiber: 0.5 g
- Protein: 1 g
- Cholesterol: 40 mg

