
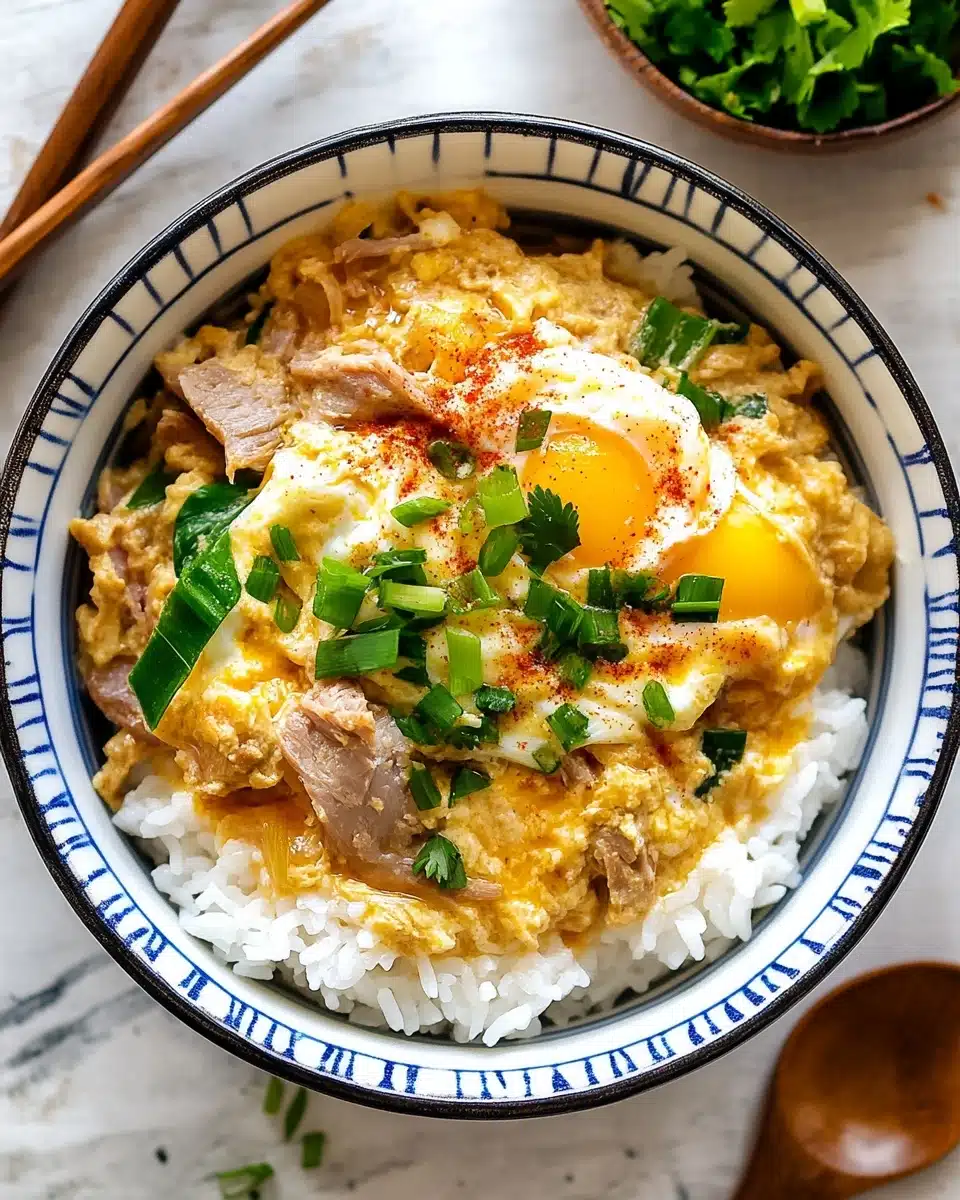
If you’re looking for a dish that’s as comforting as a warm hug, Oyakodon (Chicken and Egg Rice Bowl) is your answer. This Japanese classic is a delicious combination of tender chicken and silky eggs, gently cooked together and served over a bowl of steaming rice. It’s a quick and easy recipe that delivers a satisfying meal every time, perfect for a cozy night in.
Why You’ll Love This Recipe
- Quick and Easy: You can whip up this Oyakodon in just 25 minutes, making it a perfect weeknight dinner.
- Comfort Food: The combination of chicken, egg, and rice is soul-satisfying and warming.
- Versatile: Easily adaptable for vegetarians by swapping chicken for plant-based substitutes.
- Flavorful: With the umami-rich dashi and soy sauce, every bite is a taste sensation.
Ingredients You’ll Need
The beauty of Oyakodon lies in its simplicity. Each ingredient, from the delicate eggs to the savory dashi, plays a crucial role in heightening the flavors and textures of this beloved dish. Let’s look at what you need:
- Chicken Thighs: Boneless, skinless chicken thighs are ideal for their tender texture and rich flavor. Feel free to use a plant-based meat substitute for a vegetarian twist.
- Sake: This Japanese rice wine helps tenderize the chicken, imparting a subtle depth of flavor. Don’t worry if you don’t have sake on hand; dry sherry or Chinese rice wine works just as well.
- Eggs: Ensuring your eggs are fresh and at room temperature helps them cook evenly and contribute to the luscious, silky texture of the dish.
- Dashi: This is the backbone of Japanese cooking. Dashi infuses the Oyakodon with an umami flavor that’s hard to resist. For a vegan version, opt for a vegan dashi.
- Soy Sauce and Mirin: Together they balance saltiness and sweetness, rounding out the dish’s flavor profile.
- Mitsuba: This Japanese herb adds a fresh, peppery note; if unavailable, a sprinkle of green onion can be a good substitute.
Variations
Feel free to make Oyakodon your own! This recipe is incredibly flexible and adaptable to different dietary needs or taste preferences. Here are a few ideas to inspire your creativity:
- Vegetarian Version: Swap out the chicken with firm tofu or a store-bought plant-based meat substitute for a vegetarian or vegan-friendly meal.
- Spicy Oyakodon: For those who like a spicy kick, add a dash of shichimi togarashi to bring an exciting heat to the mild flavors.
- Extra Veggies: Sneak in more vegetables by adding sliced shiitake mushrooms or a handful of spinach just before you add the eggs.
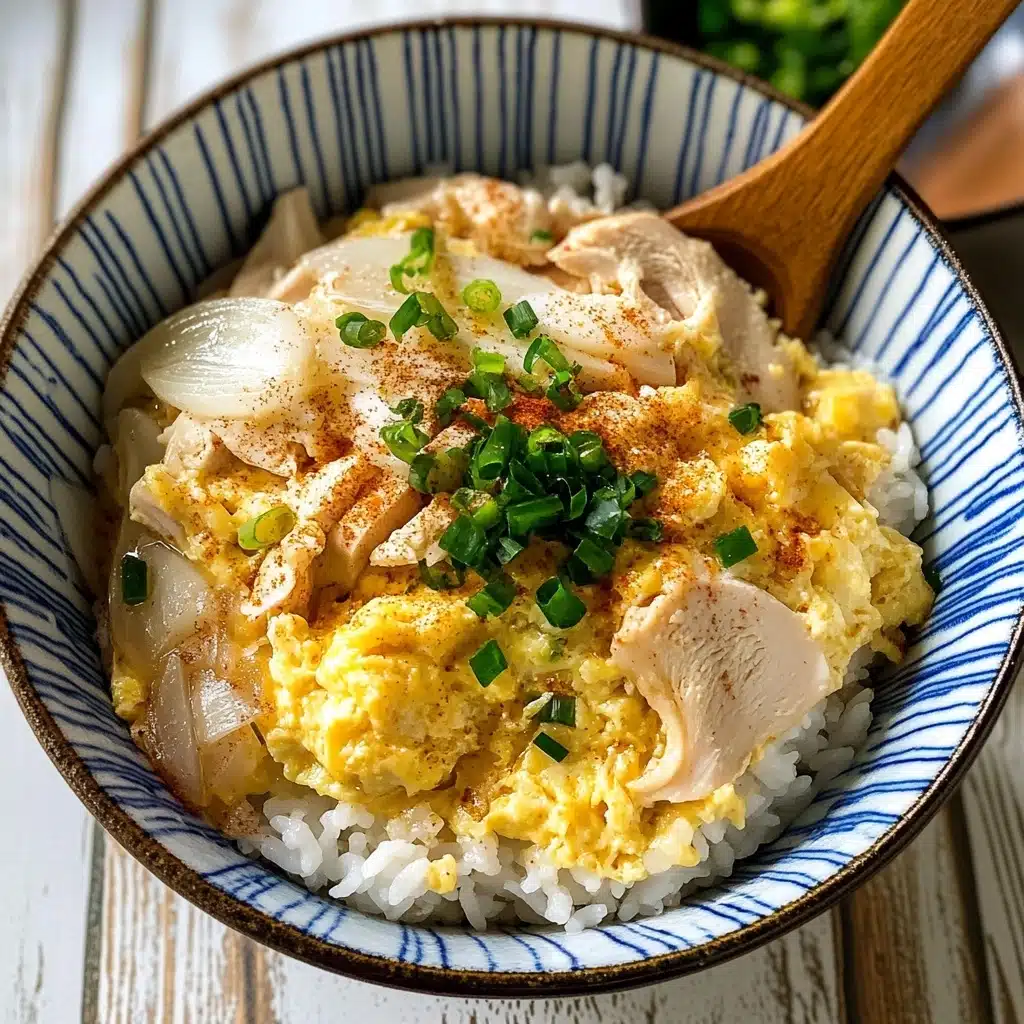
How to Make Oyakodon (Chicken and Egg Rice Bowl)
Step 1: Prep Your Ingredients
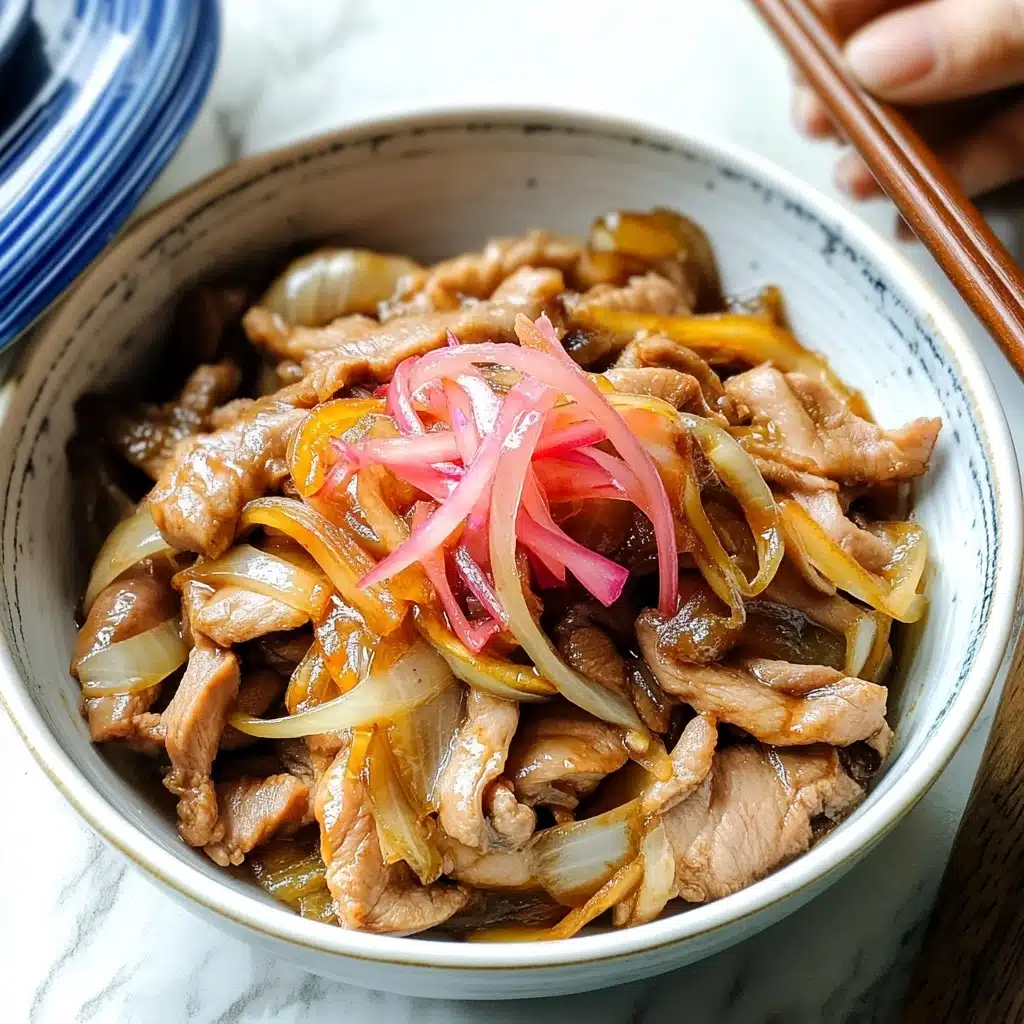
Start by slicing your onion thinly and preparing your chicken. Trim any excess fat, then cut the chicken into small, uniform pieces for even cooking. For the eggs, gently “cut” the egg whites to break them into smaller clumps, allowing them to cook quickly and creating a beautiful marbled effect.
Step 2: Cook the Chicken and Onions
In a medium frying pan, spread out your onion slices, then pour in your mixture of dashi, soy sauce, mirin, and sugar. Once it begins to simmer, layer the chicken on top. Cover and cook until the chicken turns opaque and the onions are tender, which usually takes about 5 minutes.
Step 3: Add the Eggs
With your mixture gently simmering, drizzle two-thirds of your prepped eggs over the chicken and onions. Allow them to partially set before adding the remaining eggs and herbs like mitsuba or green onion. You’ll know it’s ready when the eggs are just set, with a lovely creamy texture still in the middle.
Pro Tips for Making Oyakodon (Chicken and Egg Rice Bowl)
- Optimal Sake Use: Marinating your chicken with sake before cooking enhances the meat’s tenderness and absorbs flavors beautifully.
- Egg Timing: Pay attention to the timing of adding eggs to achieve the perfect soft and runny texture that’s characteristic of authentic Oyakodon.
- Gentle Simmer: Keep your heat low to medium low to prevent the delicate balance of flavors from burning away.
- Flavor Adjustment: Taste your seasoning liquid before adding more sugar or soy sauce, as dashi and mirin already carry salty and sweet notes.
How to Serve Oyakodon (Chicken and Egg Rice Bowl)
Garnishes
Enhance your Oyakodon’s presentation with a sprinkle of finely chopped green onions or mitsuba. For those who enjoy a bit of heat, a dash of shichimi togarashi (Japanese seven spice) works wonders.
Side Dishes
A light miso soup or a vibrant cucumber sunomono makes excellent companions to your Oyakodon. Their refreshing qualities balance the rich flavors of the dish beautifully.
Creative Ways to Present
Serve your Oyakodon in beautiful donburi bowls to keep the rice warm and provide a lovely aesthetic touch. For a more sophisticated presentation, consider using a garnish of edible flowers or colorful pickled veggies.
Make Ahead and Storage
Storing Leftovers
If you have leftovers, store them in an airtight container in the fridge for up to 2-3 days. The flavors will continue to meld, making for a tasty next-day meal.
Freezing
While freezing Oyakodon isn’t typically recommended due to the texture change in eggs, you can freeze the chicken and onion mixture before the egg is added. Simply thaw and finish with freshly cooked eggs for a quick meal.
Reheating
To reheat your Oyakodon, gently warm it in a pan over low heat or use short, controlled bursts in the microwave to avoid overcooking the eggs. A splash of water can help maintain moisture.
FAQs
-
Can I substitute the dashi in Oyakodon?
Yes, if dashi isn’t available, you can use a mild chicken or vegetable broth. However, the unique umami of dashi gives Oyakodon its distinct taste, so try a dashi packet or powder if possible.
-
Can I make Oyakodon spicier?
Absolutely! Adding shichimi togarashi or a bit of chili oil can bring a spicy kick to your Oyakodon, making it even more exciting for those who love heat.
-
What’s the best way to cook the eggs?
The key to perfect eggs in Oyakodon is to add them in two stages, allowing partial setting each time. This technique achieves a lovely contrast in textures and flavors, with some parts runny and others more set.
-
Is it safe to eat Oyakodon with runny eggs?
In Japan, eggs are typically consumed with a runny texture. If you’re outside Japan, ensure you use pasteurized eggs or cook the eggs a bit longer if you prefer them fully set.
Final Thoughts
Oyakodon (Chicken and Egg Rice Bowl) is more than just a meal; it’s a delightful embrace of warmth and comfort that invites you to explore the comforting flavors of Japanese cuisine. I hope you give it a try, and let it become a cherished part of your culinary repertoire!
Print
Oyakodon (Chicken and Egg Rice Bowl) Recipe
- Prep Time: 15 minutes
- Cook Time: 10 minutes
- Total Time: 25 minutes
- Yield: 2 servings 1x
- Category: Main Course
- Method: Stovetop
- Cuisine: Japanese
Description
Oyakodon is a classic Japanese rice bowl featuring tender chicken and soft-cooked eggs served over steaming hot short-grain rice. This comforting dish is seasoned with savory dashi, soy sauce, and mirin, creating a harmonious blend of flavors that is quick and easy to prepare, perfect for a cozy meal.
Ingredients
For the Main Ingredients
- 1/2 onion (4 oz, 113 g; peeled)
- 10 oz boneless, skinless chicken thighs (approximately 2 thighs)
- 3–4 large eggs (about 50 g each) at room temperature
For the Seasonings
- 1/2 cup dashi (Japanese soup stock)
- 2 Tbsp soy sauce
- 2 Tbsp mirin
- 2 tsp sugar
For Serving
- 2 servings cooked Japanese short-grain rice (about 1 2/3 cups or 250 g per serving)
- 4 sprigs mitsuba (Japanese parsley) or green onion/scallions
- Shichimi togarashi (Japanese seven spice) (optional)
- Japanese sansho pepper (optional)
Instructions
- Gather all ingredients: Prepare all the ingredients listed, ensuring the rice is cooked and ready to serve.
- Make the seasonings: Mix ½ cup dashi, 2 Tbsp soy sauce, 2 Tbsp mirin, and 2 tsp sugar in a bowl until the sugar dissolves.
- Prepare the chicken: Trim excess fat from the chicken thighs. Slice lengthwise into ¾–1 inch wide strips, then cut against the grain into small bite-sized pieces. Transfer to a bowl and sprinkle with 1 Tbsp sake, marinate for 5 minutes.
- Crack eggs: Crack 3-4 eggs into a bowl. Lift the whites with chopsticks, making 5–6 cuts to keep whites from falling apart. Do not whisk or beat. Set aside.
- Cook the main ingredients (using a medium frying pan): Place sliced onions in the pan, add seasoning mixture to just cover, turn on medium heat and simmer. Once simmering, add chicken evenly over onions. Lower heat to medium low and cook uncovered for 5 minutes, flipping halfway.
- Add eggs (second step): Increase heat to medium, drizzle two-thirds of the beaten eggs in a circular pattern over the chicken and onions. When eggs are just starting to set but still runny, pour remaining eggs over the mixture, distributing evenly. Add chopped mitsuba on top.
- Finish cooking: Cook on medium low until eggs are nearly set but still slightly runny, about 2 minutes. Remove from heat.
- Serve: Spoon the hot rice into bowls, slide the chicken and egg mixture over the rice, and drizzle with pan sauce. Garnish with additional mitsuba or scallions if desired. Serve with shichimi togarashi and sansho pepper on the side.
- Optional alternative (using small frying pan): Divide ingredients in half, cook each batch separately following the same steps, then assemble in bowls.
Notes
- Ensure chicken is fully cooked with no pink remaining before adding the eggs.
- Using high-quality dashi stock enhances the umami flavor of the dish.
- For a richer flavor, add a splash of sake or mirin directly into the beaten eggs before pouring.
- You can add additional toppings like shredded nori or a dash of sesame seeds for extra flavor.
- Leftovers can be refrigerated and reheated, but the eggs are best enjoyed fresh for optimal texture.
Nutrition
- Serving Size: 1 bowl (about 300g)
- Calories: 537 kcal
- Sugar: 11 g
- Sodium: 1197 mg
- Fat: 13 g
- Saturated Fat: 4 g
- Unsaturated Fat: 9 g
- Trans Fat: 0.1 g
- Carbohydrates: 50 g
- Fiber: 1 g
- Protein: 42 g
- Cholesterol: 414 mg


