
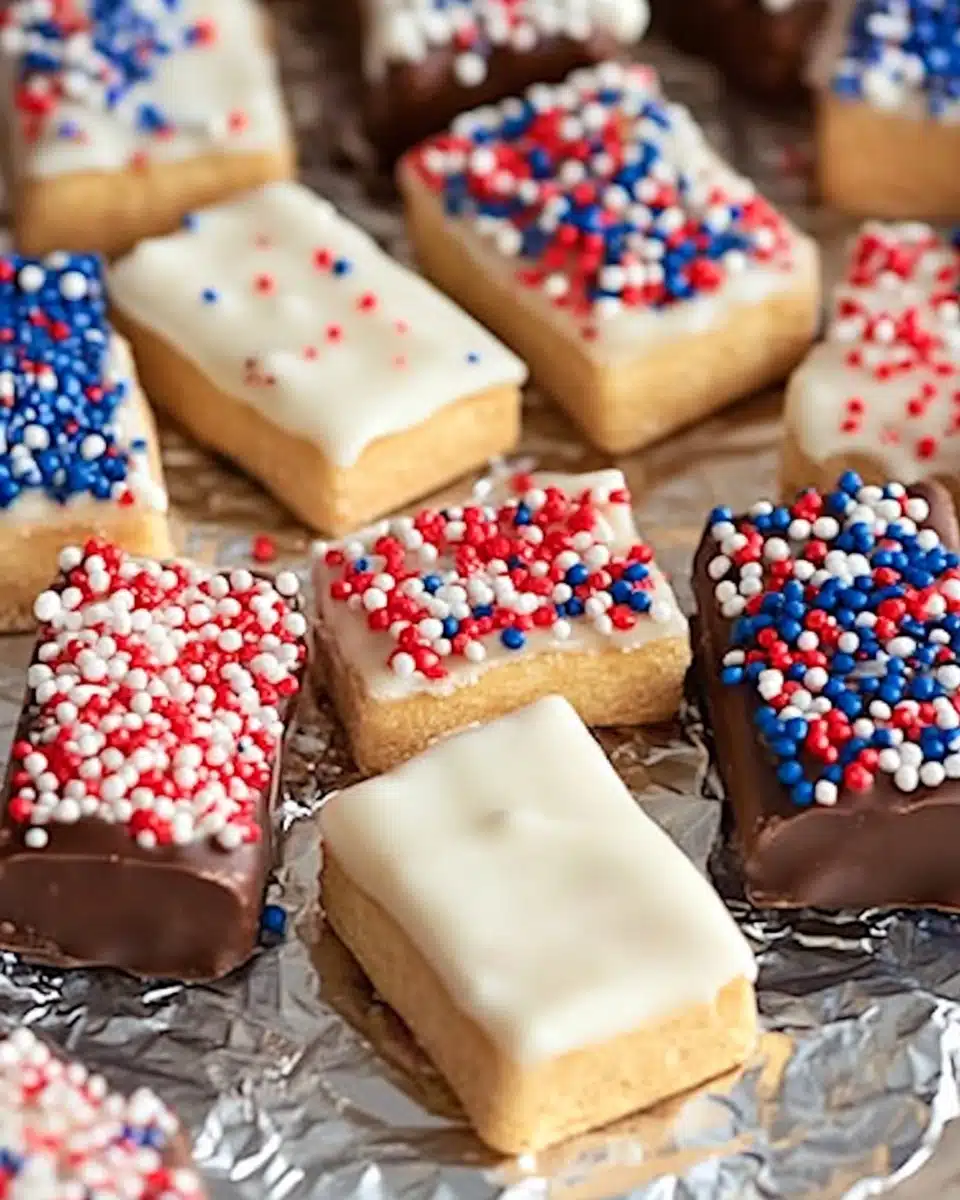
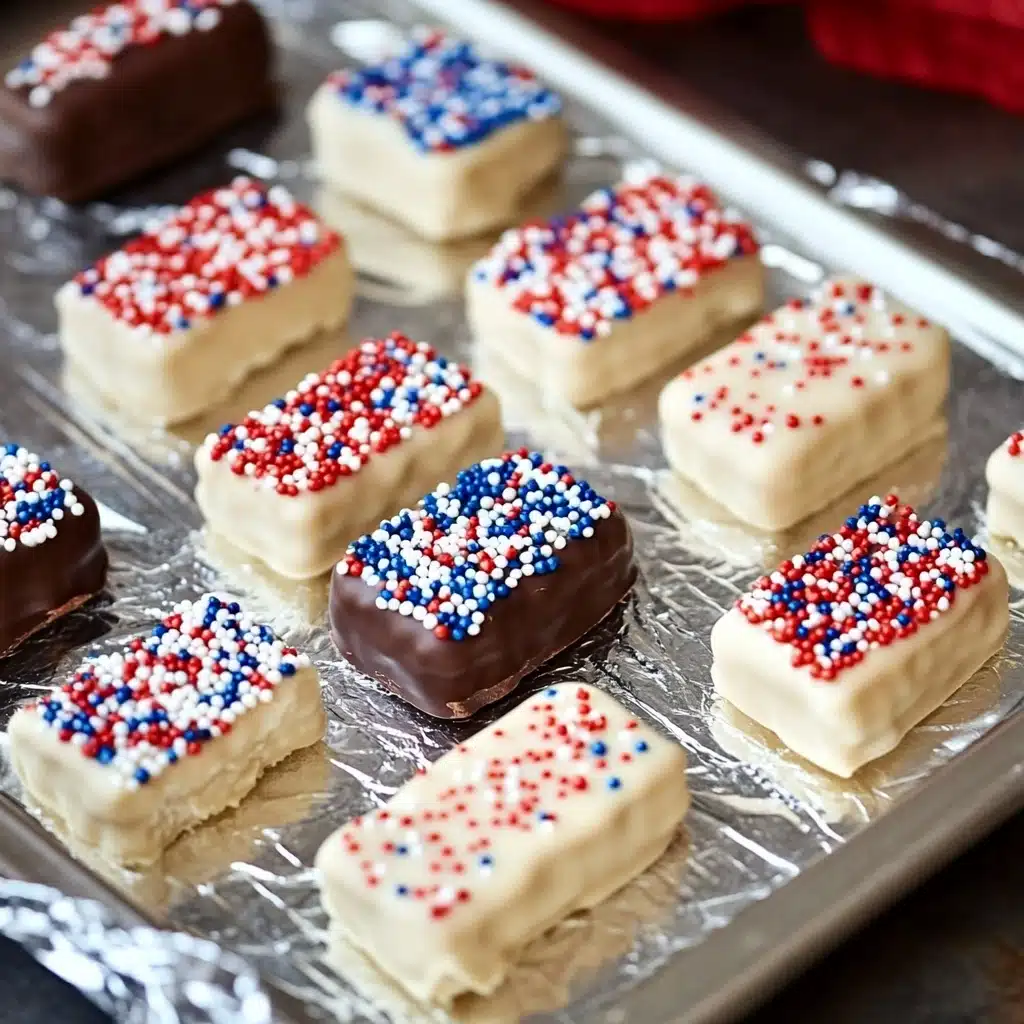
These Red White & Blue Chocolate-Dipped Sugar Wafers are the ultimate festive treat—crisp, creamy, colorful, and absolutely irresistible! With crunchy sugar wafers cloaked in luscious chocolate and a playful shower of patriotic sprinkles, they’re a no-bake favorite that both kids and adults swoon over. Perfect for summer barbecues, picnics, or simply sharing with friends, these wafers bring a sweet burst of celebration to any table.
Why You’ll Love This Recipe
- Quick & No-Bake: Ready in about 20 minutes with zero oven time—perfect for hot summer days or spur-of-the-moment celebrations.
- Perfectly Festive: The bold red, white, and blue colors make these wafers an eye-catching centerpiece for patriotic holidays or fun gatherings.
- Totally Customizable: You can use any kind of chocolate or sprinkles to match your taste (or the occasion!), making each batch your own.
- Loved by All Ages: Crunchy, creamy, and sweet—the combination pleases kids and adults alike, making these a crowd-favorite treat.

Ingredients You’ll Need
Don’t you love when a show-stopping treat comes together with basic pantry staples? Each of these essential ingredients plays a part—the sugar wafers bring that iconic crunch, while creamy chocolate and vibrant sprinkles deliver pure joy with every bite!
- Sugar wafer cookies: The star of the show! Light, crispy layers give these treats their irresistibly airy crunch and a sweet vanilla base for all the chocolatey goodness.
- White candy melts or white bark coating: These coat the wafers in a blanket of creamy sweetness—and provide a canvas for bright patriotic sprinkles.
- Milk chocolate candy melts or chocolate bark coating: For those who love classic chocolate flavor—milk chocolate adds richness and a little extra nostalgia.
- Shortening: Just a tablespoon helps your chocolate melt to the perfect silky texture for easy dipping and a beautiful glossy finish.
- Assorted red, white, & blue sprinkles: This is where the fun comes in! Nonpareils, jimmies, confetti—whatever you have on hand brings crunch and sparkle.
Variations
If you love to experiment in the kitchen, you’ll have a blast making these your own—there are so many playful possibilities! Switch up colors, flavors, or shapes to tailor these Red White & Blue Chocolate-Dipped Sugar Wafers for any occasion or craving.
- All-White or All-Chocolate: Prefer one chocolate over the other? Go for all-white or all-milk chocolate coating—either is just as luscious and festive.
- Different Sprinkle Mixes: Create a theme for any holiday using seasonal sprinkle colors—think green & red for Christmas, or pastel for spring celebrations.
- Flavored Candy Melts: Get creative and use colored or flavored candy melts—like strawberry, lemon, or vanilla—to add another fun layer of taste.
- Gluten-Free Option: Look for gluten-free sugar wafers or swap in your favorite sturdy gluten-free cookie for everyone to enjoy.
How to Make Red White & Blue Chocolate-Dipped Sugar Wafers
Step 1: Melt the Chocolate and Prep Your Station
Start by setting up a workspace with a sheet of wax or parchment paper for drying. In microwave-safe bowls, gently melt your candy melts or bark coating with the shortening—usually in 30-second bursts, stirring after each, just until smooth. Be sure not to overheat, so your chocolate stays glossy and easy to dip.
Step 2: Dip and Decorate the Wafers
Working one cookie at a time, dip about three-quarters of each sugar wafer into your melted chocolate. Let any extra drip off, then immediately sprinkle generously with your favorite red, white, and blue sprinkles. The sooner you sprinkle, the better they’ll stick!
Step 3: Let Them Set
Place your decorated wafers onto the wax paper to harden. Let them sit at room temperature until the chocolate has fully set—they’ll look irresistibly glossy and ready to serve! If you’re in a hurry, you can pop them in the fridge for a few minutes to speed up the process.
Step 4: Repeat and Store
Continue dipping and decorating until you’ve used up your wafers and chocolate. Once all are set, transfer them to an airtight container and store at room temperature. They’ll stay crisp and delicious for up to two weeks—if they last that long!
Pro Tips for Making Red White & Blue Chocolate-Dipped Sugar Wafers
- Silky Smooth Coating: Add the shortening to your chocolate before melting for a perfectly dippable and glossy finish every time.
- Sprinkle Timing: Have your sprinkles at arm’s reach and decorate each wafer right after dipping—so the decorations stick rather than bounce right off!
- Kid-Friendly Assembly: Let little hands help with decorating—the process is wonderfully simple and makes for unforgettable memories.
- Batch Prep: Melting smaller batches of chocolate at a time prevents it from firming up before you’re finished dunking and decorating.
How to Serve Red White & Blue Chocolate-Dipped Sugar Wafers
Garnishes
While these showstoppers hardly need extra flourish, a scattering of shiny edible stars or additional dots of melted chocolate can add eye-catching sparkle. Plating on a bed of festive confetti or colored sugar elevates the party vibe even further.
Side Dishes
Pair your Red White & Blue Chocolate-Dipped Sugar Wafers with bowls of fresh berries, cool lemonade, or a simple vanilla ice cream—these classic flavors complement the sweet, crunchy wafers and add a refreshing touch.
Creative Ways to Present
Bundle these wafers tied with ribbon for adorable party favors, or stand them upright in mason jars on your dessert table for a playful “edible bouquet.” Arranged on a tiered stand with other patriotic treats, they become the delicious centerpiece everyone remembers.
Make Ahead and Storage
Storing Leftovers
To keep your Red White & Blue Chocolate-Dipped Sugar Wafers as crisp as day one, store them in an airtight container at room temperature, away from direct sunlight or humidity. Properly stored, they remain fresh and snappy for up to two weeks.
Freezing
These wafers actually freeze well! Arrange them in single layers with wax paper between each, then tightly seal in a freezer-safe container. Thaw at room temperature (uncovered) for about 30 minutes and they’re party-ready again.
Reheating
Reheating isn’t really necessary for these—just let them come back to room temperature after freezing. If the chocolate looks a bit frosty, a brief sit in a warm (but not hot) room always brings back their shine and snap!
FAQs
-
Can I make Red White & Blue Chocolate-Dipped Sugar Wafers with dark chocolate instead?
Absolutely! Dark chocolate bark or candy melts work beautifully. The bittersweet flavor adds a sophisticated twist—just follow the same melting and dipping steps, and your dark chocolate-dipped wafers will be just as festive.
-
My chocolate coating hardened before I finished dipping. What should I do?
No worries! Just pop the bowl back in the microwave in short, 10-15 second bursts and stir well. Stirring keeps the chocolate smooth and prevents scorching—never add water, as it can cause the chocolate to seize.
-
Can I use other types of cookies instead of sugar wafers?
While sugar wafers give that signature crunch and airy texture, you can absolutely experiment! Try sturdy shortbread fingers or crisp graham crackers—just make sure they hold up well to dipping and decorating.
-
How far in advance can I make Red White & Blue Chocolate-Dipped Sugar Wafers?
You can easily make these up to two weeks ahead! Just store them in a tightly sealed container at room temperature, and they’ll still taste freshly dipped when you’re ready to serve.
Final Thoughts
If you’re looking for an easy, joyful treat that delivers on both looks and flavor, these Red White & Blue Chocolate-Dipped Sugar Wafers are a must-try. They’re playful, customizable, and guaranteed to disappear fast—so don’t forget to sneak a few for yourself before they vanish from the platter!
Print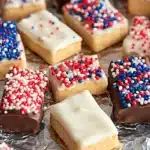
Red White & Blue Chocolate-Dipped Sugar Wafers Recipe
- Prep Time: 20 minutes
- Cook Time: 0 minutes
- Total Time: 20 minutes
- Yield: 40-60 wafers
- Category: Dessert
- Method: Dipping
- Cuisine: American
- Diet: Vegetarian
Description
These Red, White & Blue Chocolate-Dipped Sugar Wafers are a delightful treat perfect for patriotic celebrations or any occasion. Crisp sugar wafers coated in a mix of white and milk chocolate, adorned with red, white, and blue sprinkles.
Ingredients
Ingredients for Red White & Blue Chocolate-Dipped Sugar Wafers:
- 2 (8 oz. or 9 oz.) packages sugar wafer cookies
- 1 (1 lb.) package white candy melts or 1 (24 oz.) package white bark coating
- 1 (1 lb.) package milk chocolate candy melts or 1 (24 oz.) package chocolate bark coating
- 1 T. shortening
- Assorted red, white, & blue sprinkles (e.g., white non-pareils, blue jimmies, red confetti sprinkles)
Instructions
- Melt the chocolate coating: Combine white and milk chocolate melts or bark coating with shortening in the microwave per package directions.
- Dip the sugar wafers: Dip 3/4 of a sugar wafer into the melted chocolate, then sprinkle with desired sprinkles.
- Set the wafers: Place the coated wafers on wax paper to set.
- Repeat and store: Repeat with remaining wafers and store in an airtight container for up to two weeks.
Notes
- You can customize by using all white chocolate, all milk chocolate, or a mix of both.
- Each 1 lb. package of chocolate coating can cover about 40 sugar wafers.
Nutrition
- Serving Size: 1 sugar wafer
- Calories: Approximately 120
- Sugar: Approximately 10g
- Sodium: Approximately 70mg
- Fat: Approximately 6g
- Saturated Fat: Approximately 4g
- Unsaturated Fat: Approximately 2g
- Trans Fat: 0g
- Carbohydrates: Approximately 15g
- Fiber: Less than 1g
- Protein: Less than 1g
- Cholesterol: 0mg


