
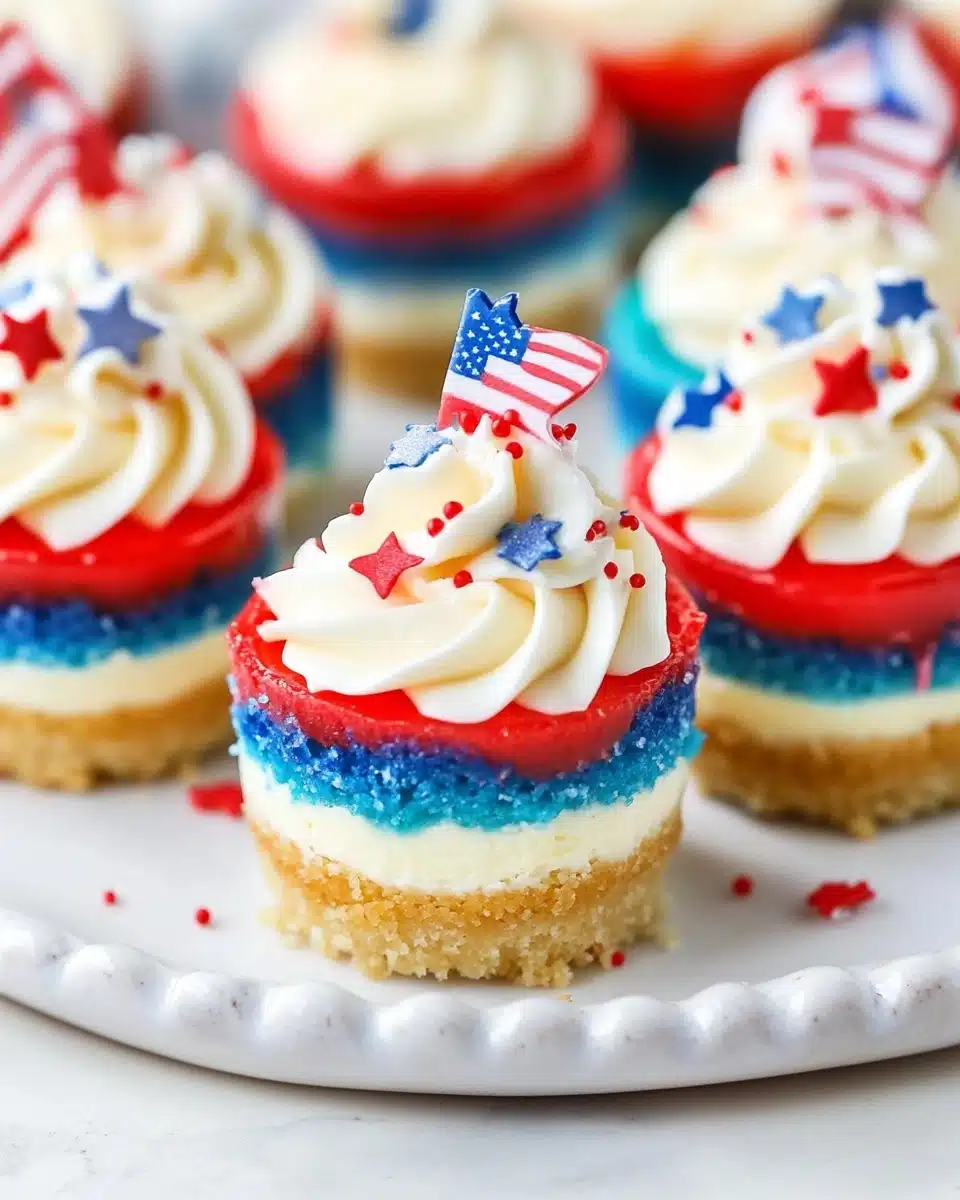
Red, White and Blue Mini Cheesecakes are the adorable, colorful treats you’ll love making (and eating!) for any patriotic holiday—or whenever you crave something fun and delicious. Creamy, luscious cheesecake layered over a buttery vanilla wafer crust, topped with clouds of whipped cream and festive sprinkles—what’s not to love?
Why You’ll Love This Recipe
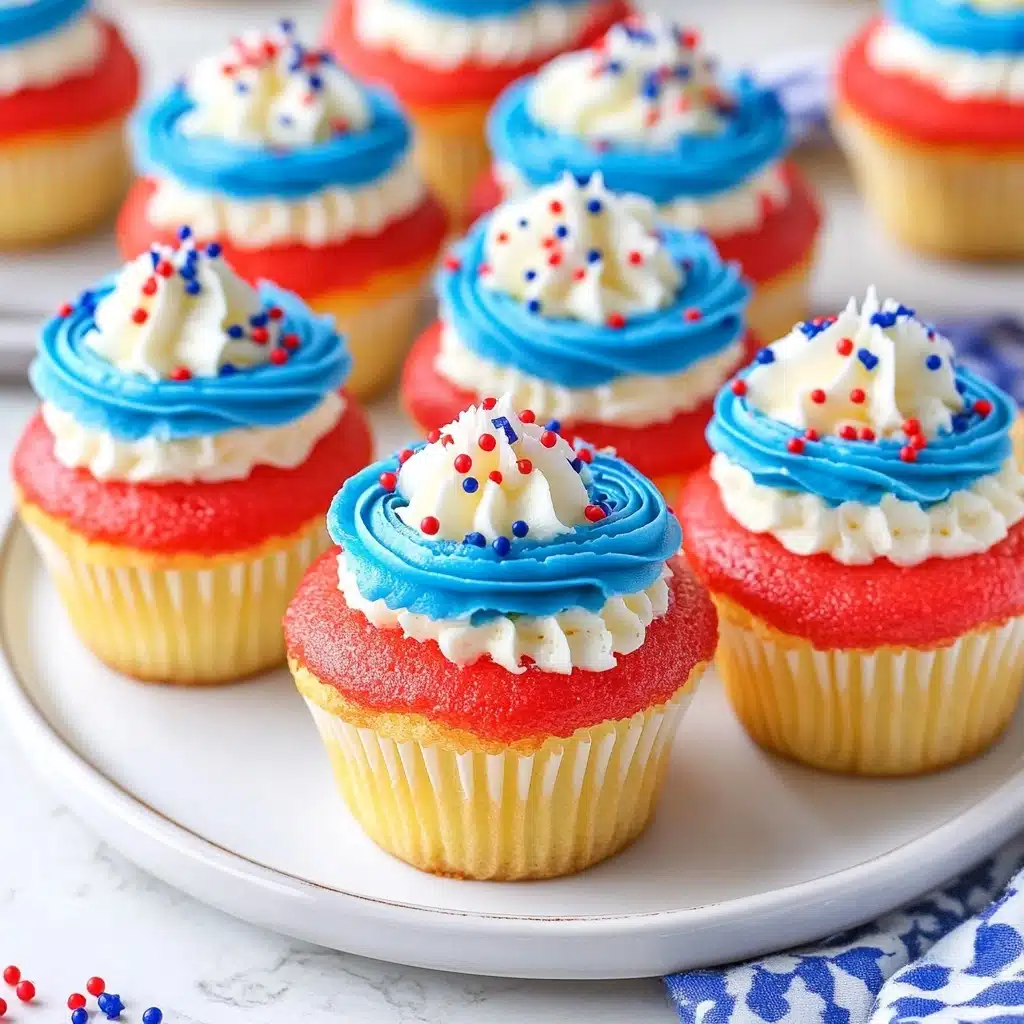
- Colorful & Festive: These cheesecakes instantly brighten up any holiday table or party with their eye-catching red, white, and blue layers.
- No Fuss, Mini Size: Individual portions make serving a breeze, and you get that perfect bite of creamy cheesecake every time.
- Make Ahead Friendly: Perfect for prepping a day or two before your celebration, so you’ll spend less time in the kitchen and more time having fun.
- Customizable: Switch up the colors or toppings to fit any occasion or craving—it’s like having a blank (delicious) canvas!

Ingredients You’ll Need
Each ingredient here is simple but essential—together, they create the perfect balance of creamy, tangy cheesecake and a buttery, crunchy crust. A pop of color and a swirl of whipped cream bring everything together for those irresistible Red, White and Blue Mini Cheesecakes.
- Vanilla wafer cookie crumbs: These create a sweet, sturdy base with a gentle vanilla flavor that complements the cheesecake layer.
- Granulated sugar: Used in both the crust and filling, a touch of sugar brings out all the flavors and adds the right amount of sweetness.
- Butter: Melted butter binds the crust and gives it that classic, golden richness.
- Cream cheese: The creamy, dreamy star of any cheesecake—always use full-fat and make sure it’s at room temperature for the smoothest texture.
- All-purpose flour: Just a bit helps set the filling and creates that heavenly, velvety bite.
- Sour cream: Adds a welcome tang and keeps the filling light and fluffy.
- Vanilla extract: Essential for depth of flavor; don’t skip it!
- Eggs: Give the cheesecake its rich structure and bake up silky-smooth.
- Red and blue gel icing color: These concentrated colors deliver gorgeous, vibrant layers without thinning the batter.
- Heavy whipping cream: The secret to pillowy homemade whipped cream, perfect for topping.
- Powdered sugar: Sweetens and stabilizes the whipped cream so it pipes beautifully.
- Sprinkles: The festive finishing touch—choose classic red, white, and blue or customize with your favorites.
Variations
I love how easy it is to make these Red, White and Blue Mini Cheesecakes your own. No matter your crowd, dietary needs, or favorite flavors, you can tweak the recipe and still get delicious results every time.
- Graham Crackers Instead of Vanilla Wafers: Swap in graham cracker crumbs for a slightly toastier, classic crust that pairs just as well with the cheesecake filling.
- Gluten-Free Option: Use gluten-free cookies and flour for a party treat everyone can enjoy—nobody will notice the difference!
- Change the Colors: Try other gel coloring to match different holidays or themes—think pastel shades for spring, or your favorite team’s colors for game day.
- Lemon Zest or Almond Extract: Add a spoonful of lemon zest or substitute almond for a delicious flavor twist in the filling.
- Dairy-Free: Use vegan cream cheese and swap the whipped cream for coconut whipped topping for a dairy-free dessert that still tastes indulgent.
How to Make Red, White and Blue Mini Cheesecakes
Step 1: Prep the Pan and Make the Crust
Preheat your oven to 325°F (162°C) and line a cupcake pan with paper liners—this makes removing your cheesecakes a total breeze! Combine your vanilla wafer cookie crumbs, sugar, and melted butter in a bowl, then scoop about 2 tablespoons of the crumb mixture into each liner. Press the crumbs down firmly with the back of a spoon to create an even, solid base for each mini cheesecake.
Step 2: Bake and Cool the Crust
Bake the prepared crusts for just 5 minutes—this sets them and prevents sogginess. Remove from the oven and let them cool slightly while you move on to mixing up the creamy filling. The short bake gives your base that perfect, gentle crunch!
Step 3: Make the Cheesecake Filling
Lower your oven temperature to 300°F (148°C). In a large bowl, mix the room temperature cream cheese, sugar, and flour using low speed—this keeps the batter dense and avoids extra air that can cause cracks. Scrape the bowl well, then blend in sour cream and vanilla extract until everything’s smooth and dreamy.
Step 4: Add the Eggs
Add the eggs one at a time, still mixing slowly. Gently scrape down the sides as you go to ensure a perfectly even, velvety batter. This step is where your filling truly comes together—don’t rush it!
Step 5: Color and Layer the Batter
Divide your beautiful cheesecake batter evenly into three separate bowls. Leave one plain (white), tint another with red gel icing color, and the third with blue—remember, a little gel color goes a long way! Start layering in each crust: first a spoonful of white, then red, then blue, alternating until the liners are nearly full for that eye-catching patriotic pattern.
Step 6: Bake, Cool, and Chill
Bake for 18–20 minutes until softly set, then turn the oven off but leave the cheesecakes inside (door closed!) for another 10 minutes to gently finish baking. Next, crack the oven door and let them cool for 15–20 minutes. This slow cooling helps prevent cracks. Once they’re room temperature, pop them in the fridge to chill completely—this is where the magic happens and those flavors and textures get even better!
Step 7: Whip and Pipe the Topping
When your Red, White and Blue Mini Cheesecakes are completely chilled, make your homemade whipped cream by beating cold heavy whipping cream, powdered sugar, and vanilla extract until stiff peaks form. Pipe generous swirls onto each cheesecake and crown them with sprinkles—prepare for oohs and aahs at every party!
Pro Tips for Making Red, White and Blue Mini Cheesecakes
- Bring Cream Cheese to Room Temp: Softened cream cheese ensures your batter blends perfectly smooth with no pesky lumps in sight.
- Use Gel Food Colors: Gels give vibrant color without thinning your cheesecake batter, for crisp, dramatic layers every time.
- Layer Batter Gently: Use a clean spoon for each color and layer carefully for distinct stripes instead of swirled colors.
- Chill Before Serving: Let the cheesecakes cool completely in the fridge for at least two hours—this sets the texture and makes unmolding effortless!
How to Serve Red, White and Blue Mini Cheesecakes
Garnishes
Don’t be shy with the toppings! A generous swirl of whipped cream creates a beautiful, classic look, but you can also add fresh berries for a sophisticated twist, or load on those patriotic sprinkles for extra sparkle. A drizzle of berry sauce or a few white chocolate shavings would also turn these Red, White and Blue Mini Cheesecakes into showstoppers.
Side Dishes
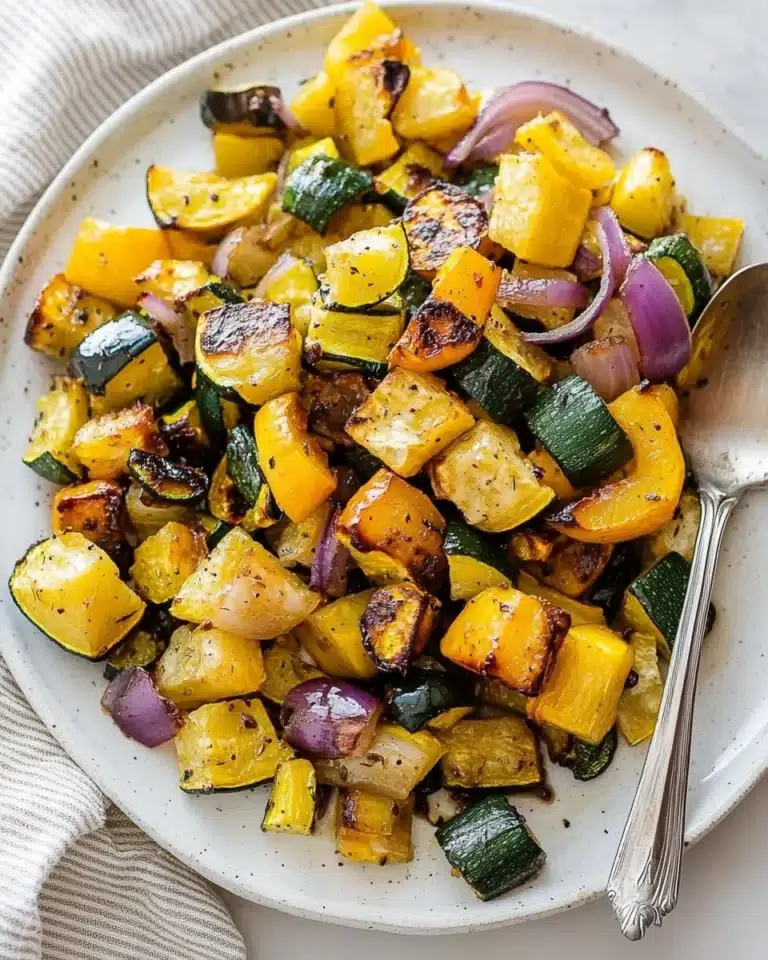
These mini cheesecakes are perfect all on their own, but they pair beautifully with a platter of fresh fruit, icy lemonade, or even a scoop of vanilla bean ice cream. If you’re making them for a summer barbecue, serve them alongside grilled peaches or a berry salad for a refreshing, colorful dessert spread.
Creative Ways to Present
For a party, arrange your Red, White and Blue Mini Cheesecakes in concentric circles on a cake stand for a “fireworks” effect, or display each in a cupcake wrapper that matches your theme. Want to get kids involved? Let them add their own sprinkles or berries on top—everyone gets a mini masterpiece!
Make Ahead and Storage
Storing Leftovers
Store any leftover Red, White and Blue Mini Cheesecakes in an airtight container in the refrigerator. They’ll keep fresh and creamy for up to 3 days, making them ideal for prepping ahead or enjoying a sweet treat a little longer!
Freezing
You can absolutely freeze these mini cheesecakes! Just skip the whipped cream until serving. Wrap each one tightly in plastic wrap and place in a freezer-safe container; they’ll keep for up to 2 months. Thaw overnight in the refrigerator before decorating and serving.
Reheating
The beauty of these cheesecakes is they’re best served cold or at room temperature—no reheating is needed! If you’ve frozen them, allow enough time for a gentle thaw in the refrigerator so their texture stays dreamy and creamy.
FAQs
-
Can I use liquid food coloring instead of gel for these cheesecakes?
Gel food coloring is highly recommended because it gives vibrant color without thinning out your batter. If you must use liquid, use it very sparingly—otherwise, your layers might blend or the texture could be impacted.
-
Do I have to let the cheesecakes chill before serving?
Yes—the chilling step is essential for the cheesecakes to set up properly and get that creamy, firm texture everyone loves. Chilling also makes them easier to unmold and decorate, so don’t skip it!
-
Can I make Red, White and Blue Mini Cheesecakes a day ahead?
Absolutely! In fact, they taste even better after a night in the fridge as the flavors have time to develop. Just wait to add the whipped cream and sprinkles until just before serving for the freshest look.
-
How do I avoid cracks in mini cheesecakes?
Mix the filling on low speed to avoid incorporating air, bake at a lower temperature, and let them cool gradually in the oven with the door cracked before chilling. These steps help prevent cracks and give you a smooth, beautiful finish!
Final Thoughts
There’s just something special about sharing a platter of Red, White and Blue Mini Cheesecakes with family and friends—each bite is pure celebration! I hope you have as much fun making (and eating) them as I do. Give them a try, and you’ll have everyone asking for the recipe at your next gathering!
Print
Red, White and Blue Mini Cheesecakes Recipe
- Prep Time: 20 minutes
- Cook Time: 20 minutes
- Total Time: 40 minutes
- Yield: 12-14 Mini Cheesecakes
- Category: Dessert
- Method: Baking
- Cuisine: American
- Diet: Vegetarian
Description
These Red, White and Blue Mini Cheesecakes are a perfect patriotic treat for any celebration. Creamy and delicious individual cheesecakes with a crunchy crust, colorful layers, and a fluffy whipped cream topping.
Ingredients
CRUST
- 1 cup (134g) vanilla wafer cookie crumbs
- 2 tbsp (26g) sugar
- 4 tbsp (56g) butter, melted
FILLING
- 12 ounces (339g) cream cheese, room temperature
- 1/2 cup (104g) sugar
- 3 tbsp (24g) flour
- 1/2 cup (115g) sour cream
- 1 1/2 tsp vanilla extract
- 2 eggs
- Blue gel icing color
- Red gel icing color
TOPPING
- 1/2 cup (120ml) heavy whipping cream, cold
- 5 tbsp (36g) powdered sugar
- 1/2 tsp vanilla extract
- Sprinkles
Instructions
- Preheat oven to 325°F (162°C). Add cupcake liners to a cupcake pan.
- Combine the vanilla wafer cookies crumbs, sugar and melted butter. Divide the mixture between the cupcake liners (about 2 tablespoons per cup) and press into the bottoms.
- Bake the crusts for 5 minutes then remove from oven. Allow to cool while you make the filling.
- To make the filling, reduce oven to 300°F (148°C). In a large bowl, mix the cream cheese, sugar, and flour until combined (Use low speed to keep less air from getting into the batter, which can cause cracks). Scrape down the sides of the bowl.
- Add the sour cream and vanilla extract. Beat on low speed until well combined.
- Add the eggs one at a time, beating slowly and scraping the sides of the bowl after each addition.
- Divide the batter evenly into three bowls. Leave one as in and color one red and there other blue.
- Layer the colored batter into the crusts, starting with a tablespoon of white batter in each cup, then a tablespoon of red, then a tablespoon of blue. The cups should be mostly full.
- Bake the cheesecakes for 18-20 minutes, then turn off the oven and leave the door closed for another 10 minutes.
- Crack the oven door and allow cheesecakes to cool for 15-20 minutes, then put in the fridge to finish cooling.
- When cheesecakes are cooled, remove them from the pan.
- To make the whipped cream topping, add the heavy whipping cream, powdered sugar and vanilla extract to a large mixer bowl. Whip on high speed until stiff peaks form.
- Pipe the whipped cream onto the tops of the cheesecakes and add sprinkles.
- Refrigerate the cheesecakes in an airtight container until ready to serve. Cheesecakes are best for 2-3 days.
Notes
- Ensure cream cheese is at room temperature for smooth filling.
- Use gel icing colors for vibrant red and blue layers.
- Allow cheesecakes to cool properly for best texture.
Nutrition
- Serving Size: 1 Mini Cheesecake
- Calories: 196
- Sugar: 15.8 g
- Sodium: 155 mg
- Fat: 11.2 g
- Saturated Fat: 6.5 g
- Unsaturated Fat: 3.6 g
- Trans Fat: 0 g
- Carbohydrates: 20.3 g
- Fiber: 0.4 g
- Protein: 4.2 g
- Cholesterol: 53.2 mg


