
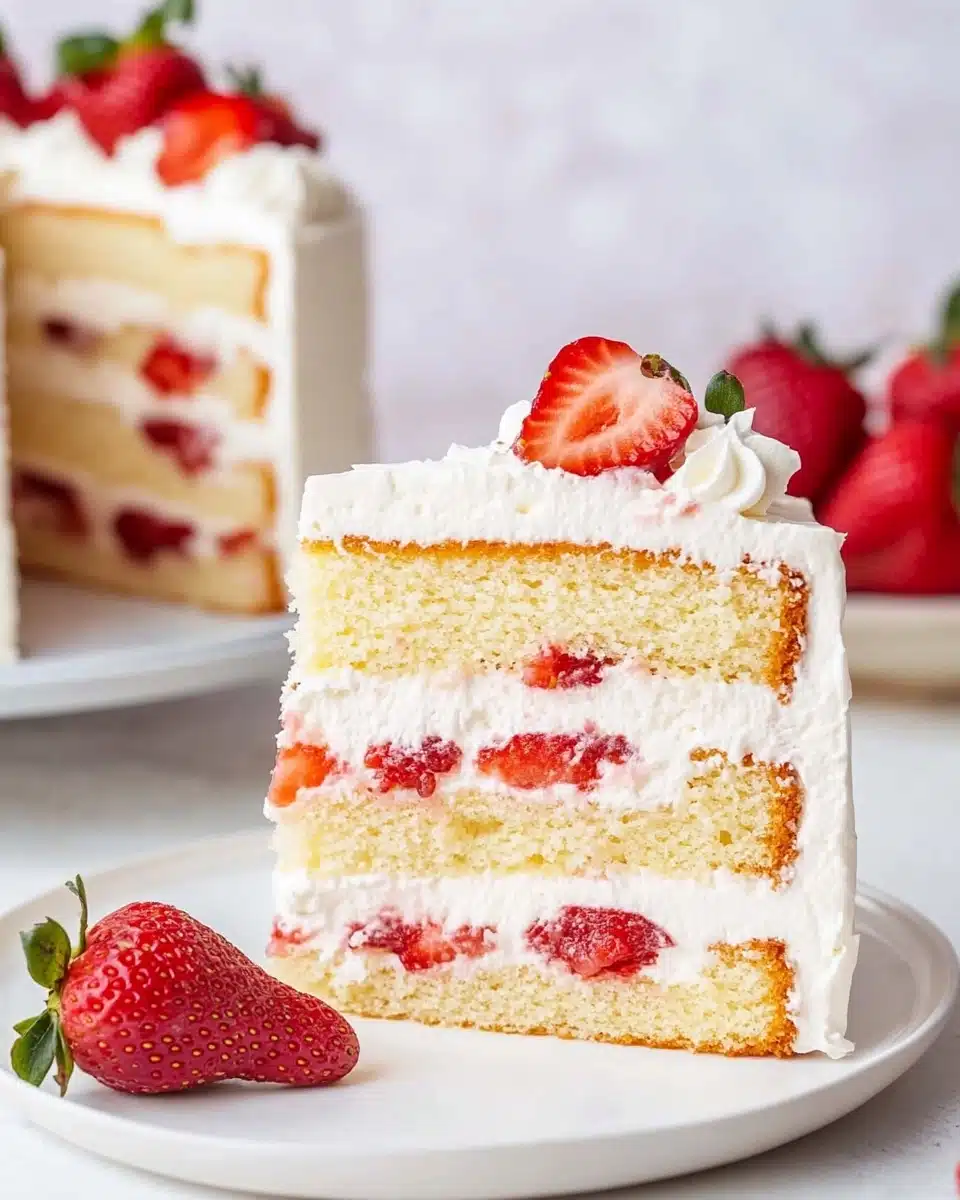
If you’re dreaming of a treat that’s equal parts nostalgic, elegant, and utterly irresistible, this Vanilla Shortcake is exactly what you need in your baking repertoire. With moist and tender cake layers infused with rich vanilla, pillowy clouds of stabilized whipped cream, and a cascade of fresh strawberries, every bite is a celebration of classic flavors done just right!
Why You’ll Love This Recipe
- Showstopper Flavors: Every layer bursts with rich vanilla and the brightness of fresh strawberries, making Vanilla Shortcake unforgettable.
- Dreamy Texture: Cake flour creates soft, luscious layers that melt in your mouth and pair perfectly with airy whipped cream.
- Year-Round Versatility: This classic shortcake adapts to any season—just swap in your favorite fruits for a whole new twist.
- Easy for Any Baker: Whether you’re an old pro or taking your first cake journey, the step-by-step method ensures glorious results every time.

Ingredients You’ll Need
What’s beautiful about Vanilla Shortcake is how it relies on foundational baking ingredients—yet, each one plays a starring role. These essentials come together for that soft, tender crumb and billowy whipped topping, all wrapped around sun-ripened strawberries.
- Cake Flour: Gives the cake its signature moist, delicate texture—don’t substitute for the real thing if you can help it!
- Unsalted Butter: Adds richness and tenderness; room temperature butter ensures even mixing and a soft crumb.
- Sugar: Sweetens and aerates the cake during mixing, which is crucial for a light texture.
- Eggs: Structure and richness! Using them at room temp helps your cake rise beautifully and bond with the other ingredients.
- Milk: Moisture for the batter—be sure it’s divided as directed for the reverse creaming method.
- Baking Powder & Baking Soda: These are the team players that give your shortcake its irresistible rise.
- Salt: Just a pinch sharpens all the flavors so nothing tastes flat.
- Canola Oil: Ensures each bite stays moist, even days after baking.
- Vanilla Extract: Star of the show! Go for pure vanilla for that signature aroma and depth.
- Fresh Strawberries: Washed, sliced, and bursting with juicy sweetness—they bring color and freshness with every layer.
- Heavy Whipping Cream: The base for your dreamy, stabilized whipped cream. It needs full fat for max fluff!
- Powdered Sugar: Sweetens and stabilizes the whipped cream so it holds up during assembly.
- Gelatin: (Optional but highly recommended!) It keeps your whipped cream sturdy and luscious, even in summer heat.
- Cold Water & Extra Cream: For blooming and melting the gelatin so it blends seamlessly into your whipped topping.
Variations
Shortcakes are meant to be personalized! Once you’ve nailed the classic Vanilla Shortcake, feel free to get playful with new flavors, seasonal fruits, and tweaks for dietary preferences. Here are some favorites to tickle your creativity:
- Berry Swap: Use raspberries, blueberries, or a medley of summer berries instead of strawberries for a vibrant twist.
- Lemon Zest: Add finely grated lemon zest to the cake batter for a bright, citrusy counterpoint to the vanilla.
- Chocolate Lover’s Version: Fold mini chocolate chips into your cake batter or drizzle ganache over the whipped cream layers.
- Gluten-Free: Substitute a high-quality gluten-free flour blend designed for cakes to make this classic accessible to everyone.
- Dairy-Free: Opt for plant-based butter, non-dairy milk, and coconut cream in the whipped topping to keep it indulgent without the dairy.
How to Make Vanilla Shortcake
Step 1: Prep the Cake Pans and Ingredients
Start things off by bringing your milk, eggs, and butter to room temperature—a total game-changer for a smooth, cohesive batter. Preheat your oven to 335°F and prep two 8” round pans with a generous swipe of pan release and a circle of parchment for worry-free cake removal. Weigh all ingredients for accuracy (trust me, you’ll love the ease!), and divide your milk as outlined for the perfect reverse creaming technique.
Step 2: Mix the Dry Ingredients & Add Butter
In your stand mixer bowl, combine cake flour, sugar, baking powder, baking soda, and salt. Add in the room temperature butter and mix until the blend looks like soft, slightly damp sand—this step sets you up for crazy-moist, tender shortcake layers.
Step 3: Create the Batter
Once your sand-like mix is ready, pour in the milk and oil mixture and beat at medium speed for 2 minutes until your batter is light and fluffy (don’t skimp—this aerates your cake beautifully). Reduce speed then slowly stream in the milk/egg/vanilla mixture until just incorporated. The batter should look pale, silky, and luscious by the end.
Step 4: Bake the Cakes
Divide the batter evenly between your prepared pans and bake for 30–35 minutes. You’ll know they’re ready when the centers spring back with a gentle touch or a toothpick comes out clean. Let the cakes cool in the pans for about 15 minutes, then flip onto a rack to finish cooling (or pop in the freezer for speedy chilling!).
Step 5: Make the Stabilized Whipped Cream
Bloom the gelatin in cold water, then whip your cream in a stand mixer until it starts foaming. Add the powdered sugar and vanilla, then microwave the gelatin until melted and translucent. Mix in an extra tablespoon of cream to cool it, then drizzle into the whipped cream as you continue to whip until stiff, billowy peaks form. This isn’t just any topping—it’s whipped cream that lasts!
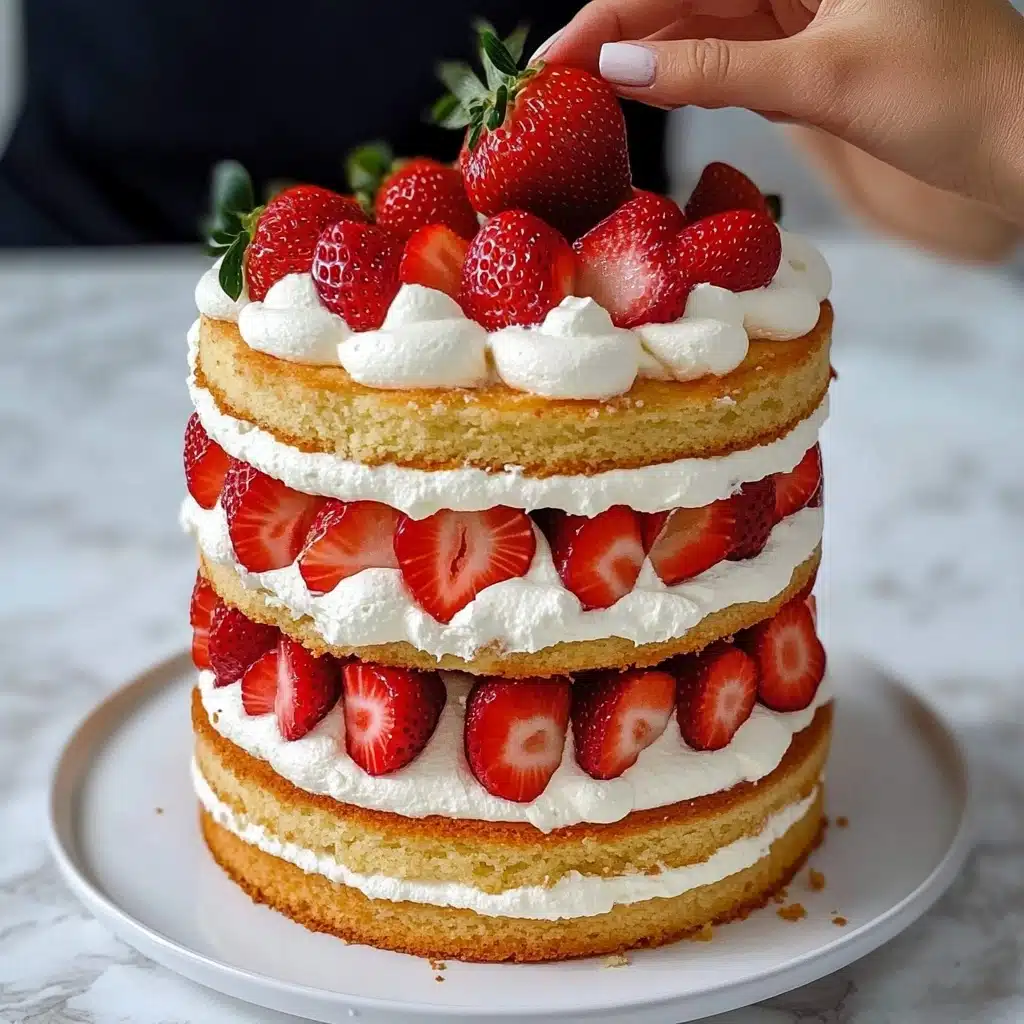
Step 6: Assemble Your Vanilla Shortcake
Slice each cake horizontally for more layers if you love extra filling. Place the first layer on a serving plate, add a generous swoosh of whipped cream, then a pretty layer of sliced strawberries. Repeat the process, finishing with decorative whipped cream swirls and whole berries on top. The cake will look like a centerpiece and slice like a dream!
Pro Tips for Making Vanilla Shortcake
- Reverse Creaming for Tenderness: Take your time mixing butter into the dry ingredients—this unique method gives the Vanilla Shortcake its signature soft and moist crumb every single time.
- Temperature Is Everything: Make sure your milk, butter, and eggs are at true room temperature before you begin to guarantee a smooth, silky batter and perfectly risen cakes.
- Gelatin Magic in Whipped Cream: Don’t skip the gelatin! This step stabilizes your whipped cream so it holds up beautifully between cake layers and won’t weep, even after slicing.
- Weigh, Don’t Guess: Use a kitchen scale for your ingredients—for reliable results, it truly takes out the guesswork and means fewer dishes too!
How to Serve Vanilla Shortcake
Garnishes
Keep it classic with a flurry of whole strawberries and a few sprigs of fresh mint for pop and color, or dust the top with a light shower of powdered sugar just before serving. If you’re feeling extra, a drizzle of strawberry syrup or a handful of white chocolate curls takes this Vanilla Shortcake to next-level gorgeous!
Side Dishes
This showstopping dessert pairs beautifully with light sips—think sparkling lemonade, fruity sangria, or even your favorite rosé. For a festive brunch, serve alongside a platter of extra fresh berries or a bright fruit salad to echo those sunny flavors in every bite.
Creative Ways to Present
For parties, slice and layer your Vanilla Shortcake in individual jars or parfait glasses for make-ahead treats, or go rustic-chic by stacking the layers slightly askew and letting fruit peek out. Want to wow a crowd? Make mini shortcake cupcakes with whipped cream and berries on top—adorable and easy to serve!
Make Ahead and Storage
Storing Leftovers
Wrap your leftover Vanilla Shortcake slices tightly in plastic wrap or store them in an airtight container in the fridge. The stabilized whipped cream means everything stays plush and fresh for up to 3 days—just keep them well covered to prevent drying out.
Freezing
The cake layers freeze like a dream: wrap them individually in plastic and store in freezer bags for up to 2 months. To freeze finished Vanilla Shortcake, slice first and wrap well; thaw overnight in the fridge for best texture. Hold off on adding fresh strawberries until just before serving for peak freshness!
Reheating
There’s no need to reheat—Vanilla Shortcake is best served chilled or at cool room temperature. If you have frozen cake layers, thaw them in the fridge, then bring to room temp before assembling for a flawless finish.
FAQs
-
Can I make the Vanilla Shortcake in advance?
Absolutely! You can bake the cake layers a day or two ahead, wrap them tightly, and refrigerate or freeze. The stabilized whipped cream can also be made ahead—just store it covered in the fridge. Assemble a few hours before serving, and add the fresh berries last for the freshest taste and texture.
-
Is there a substitute if I don’t have cake flour?
If you can’t get cake flour, use a recipe specifically for all-purpose flour, such as a white cake recipe—the cornstarch “cake flour hack” doesn’t give quite the same pillowy texture in this Vanilla Shortcake due to the reverse creaming method.
-
How do I keep my whipped cream from deflating?
Stabilized whipped cream is your secret! Blooming and gently melting gelatin, then adding it while whipping means your Vanilla Shortcake stays tall, beautiful, and creamy—not runny, even if made in advance or on a warm day.
-
Can I use other fruits besides strawberries?
Of course! Raspberries, blueberries, blackberries, or even peaches pair beautifully with the vanilla cake and whipped cream in this dessert. Feel free to use whatever’s in season or your family’s favorite for a personal twist on classic Vanilla Shortcake.
Final Thoughts
No matter the season or the crowd, Vanilla Shortcake always feels like a special occasion. So gather your berries, whip up this beautiful cake, and get ready to impress—one forkful and you’ll fall in love with the magic of homemade shortcake all over again!
Print
Strawberry Shortcake Layer Cake Recipe
- Prep Time: 25 minutes
- Cook Time: 30 minutes
- Total Time: 55 minutes
- Yield: 8 cups
- Category: Dessert
- Method: Baking
- Cuisine: American
- Diet: Vegetarian
Description
Indulge in the sweet and fruity flavors of this luscious Vanilla Shortcake. Layers of moist vanilla cake, stabilized whipped cream, and fresh strawberries come together to create a heavenly dessert perfect for any occasion.
Ingredients
Cake:
- 10 ounces milk room temperature, divided evenly into two measuring cups
- 3 ounces canola oil
- 1 Tablespoon vanilla extract
- 3 Large eggs room temperature
- 13 ounces cake flour
- 13 ounces sugar
- 3 teaspoons baking powder
- 1/4 teaspoon baking soda
- 1/2 teaspoon salt
- 8 ounces unsalted butter room temperature
Stabilized Whipped Cream:
- 24 ounces heavy whipping cream
- 4 ounces powdered sugar
- 2 teaspoons gelatin (KNOX brand)
- 3 Tablespoons cold water
- 2 teaspoons vanilla extract
- 1 Tablespoon heavy whipping cream for the gelatin
For Filling:
- 16 ounces fresh strawberries washed and sliced
Instructions
- Making the Vanilla Cake – Bring all ingredients to room temperature. Preheat oven, prepare pans. Measure ingredients. Mix dry ingredients, add butter, mix. Add milk/oil mixture, then egg mixture. Divide batter, bake, and cool cakes.
- Making the Whipped Cream – Bloom gelatin, whip cream with sugar and vanilla. Add gelatin mixture and whip to firm peaks.
- Assembling the Strawberry Shortcake Cake – Slice cakes, slice strawberries, layer cake with whipped cream and berries. Finish with whipped cream and berries on top.
Notes
- Using cake flour ensures moist layers. Substitute with white cake recipe if needed.
- Keep berries fresh with natural berry wash.
- Explore alternatives to gelatin for stabilizing whipped cream.
- Cake flour with 9% or less protein recommended.
Nutrition
- Serving Size: 1 cup
- Calories: 1070 kcal
- Sugar: 67g
- Sodium: 252mg
- Fat: 69g
- Saturated Fat: 37g
- Unsaturated Fat: 28g
- Trans Fat: 1g
- Carbohydrates: 103g
- Fiber: 2g
- Protein: 13g
- Cholesterol: 233mg


