
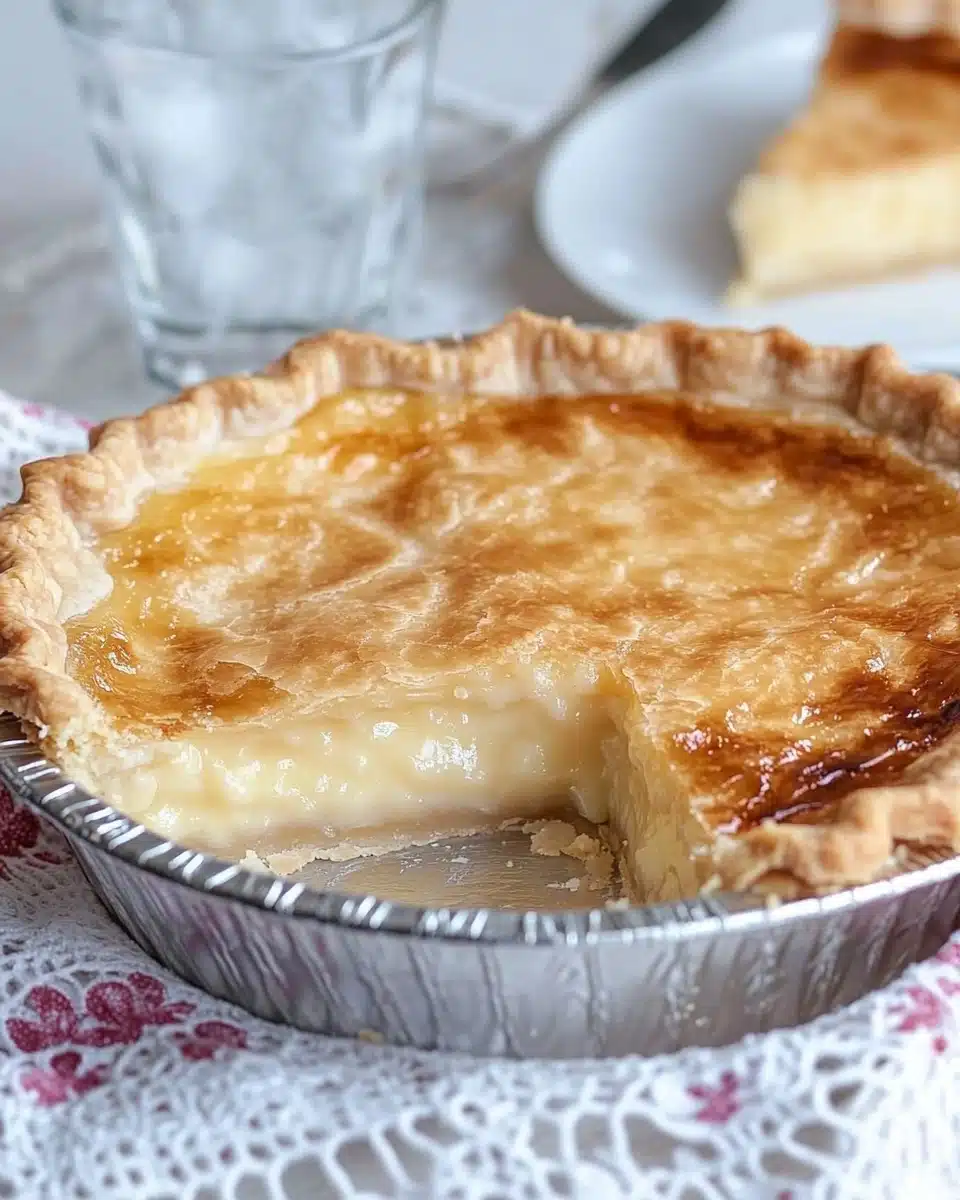
If you love a great backstory with your dessert, Water Pie is the whimsical, old-fashioned treat that turns humble pantry staples into a sweet, silky magic trick. Born out of resourcefulness during tough times, this Depression-era classic delivers a custard-like filling with almost no effort—and it’s downright delicious!
Why You’ll Love This Recipe
- Unbelievably Easy: Water Pie requires absolutely no fancy skills—just layer, bake, and chill for sweet results.
- Pantry Staple Magic: You probably have everything you need in your kitchen already, so you can whip this up anytime a craving strikes.
- Sweet, Silky Texture: The simple ingredients transform into a luscious custard filling that’s lightly sweet and melts in your mouth.
- A Slice of Nostalgia: There’s something extra special about connecting with history while making and sharing Water Pie with friends or family.
Ingredients You’ll Need
Before you begin, don’t be fooled by the short list—each ingredient in Water Pie brings something special to the table. Together, they create creamy, custardy magic with that irresistible homemade flavor you only get from simple, honest baking.
- Unbaked 9-inch deep-dish pie crust: Store-bought or homemade, this is your vessel and adds a buttery, flaky base that cradles the silky pie filling.
- Water: The star of the show! Plain water gives this pie its uniquely smooth texture and blends perfectly with the other ingredients as it bakes.
- All-purpose flour: This acts as a gentle thickener for that silky custard effect—no eggs or cornstarch needed.
- Sugar: It brings the familiar, comforting sweetness that balances everything in the bite.
- Vanilla extract: Just a splash infuses the pie with lovely aromatic warmth and depth—don’t skip this!
- Butter: Little pats on top melt as the pie bakes, giving the filling its glossy finish and rich flavor.
Variations
One of the most delightful things about Water Pie is how forgiving it is. Feel free to play, experiment, and put your own spin on this classic recipe to match what’s in your pantry or your mood!
- Citrus-Zest Twist: Add a teaspoon of fresh lemon or orange zest to the filling for a subtle, sunny lift.
- Brown Sugar Swap: Swap out half (or all) of the white sugar for brown sugar for deeper, caramel-like sweetness and a touch of color.
- Dairy-Free Version: Use a plant-based butter and a vegan pie crust to make Water Pie completely dairy free—no flavor sacrificed!
- Spice It Up: Sprinkle in a pinch of ground cinnamon or nutmeg for an aromatic, cozy twist that feels extra homey.
How to Make Water Pie
Step 1: Prep Your Pie Crust
Preheat your oven to 400°F (200°C) and grab your unbaked deep-dish pie crust, setting it onto a baking sheet. This setup makes it easy (and tidy!) to move your pie in and out of the oven, and helps catch any little spills.
Step 2: Add the Water
Carefully pour 1½ cups of water right into the pie crust. Don’t worry—it might feel strange to pour water into a pastry shell, but trust the process. This is what makes Water Pie so fun and magical!
Step 3: Mix Dry Ingredients
In a small bowl, stir together the flour and sugar until well-combined. Sprinkle this mixture evenly over the water in your pie crust—don’t stir or mix! Just let it settle over the surface to form a lovely gelled layer as it bakes.
Step 4: Flavor and Butter
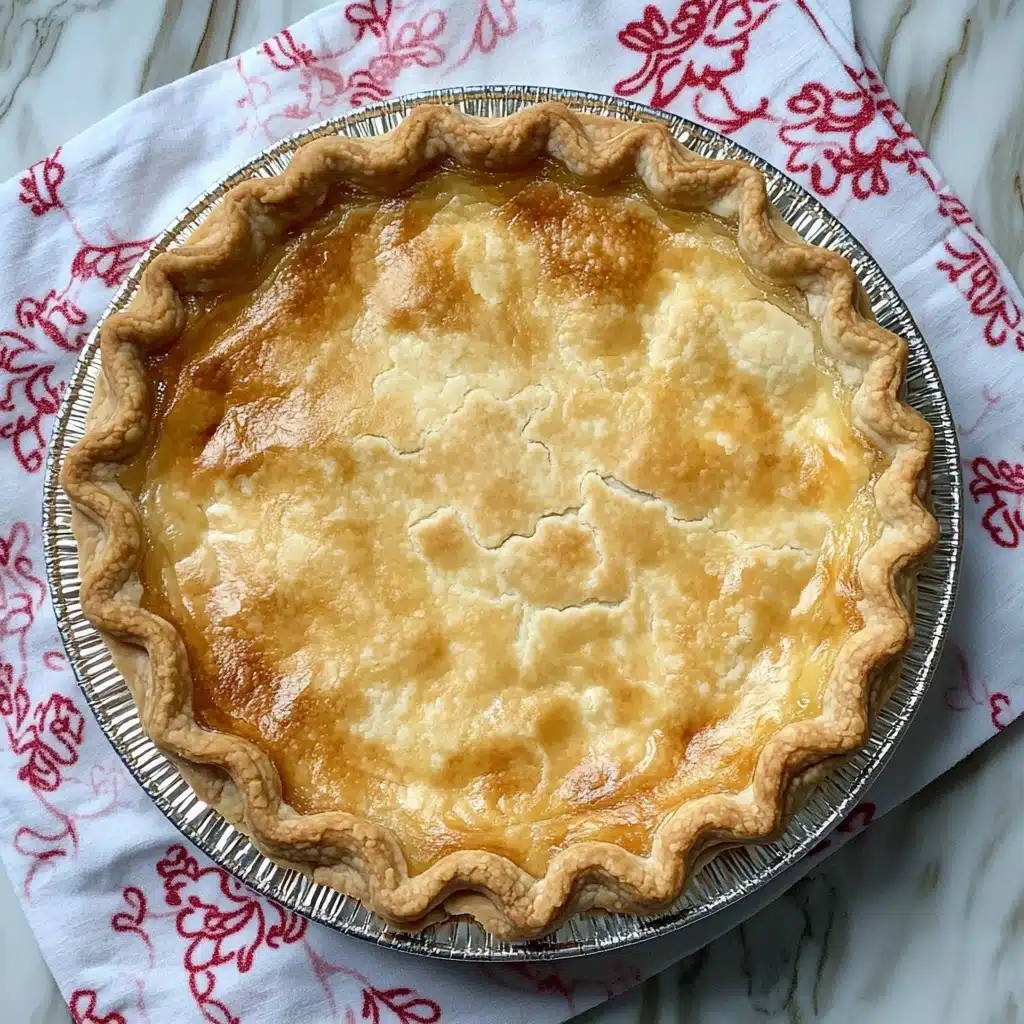
Drizzle your vanilla extract evenly over the top, then place 5 little pats of butter across the filling. As it bakes, the butter will melt and float, helping to create that signature silky top.
Step 5: Bake and Cool
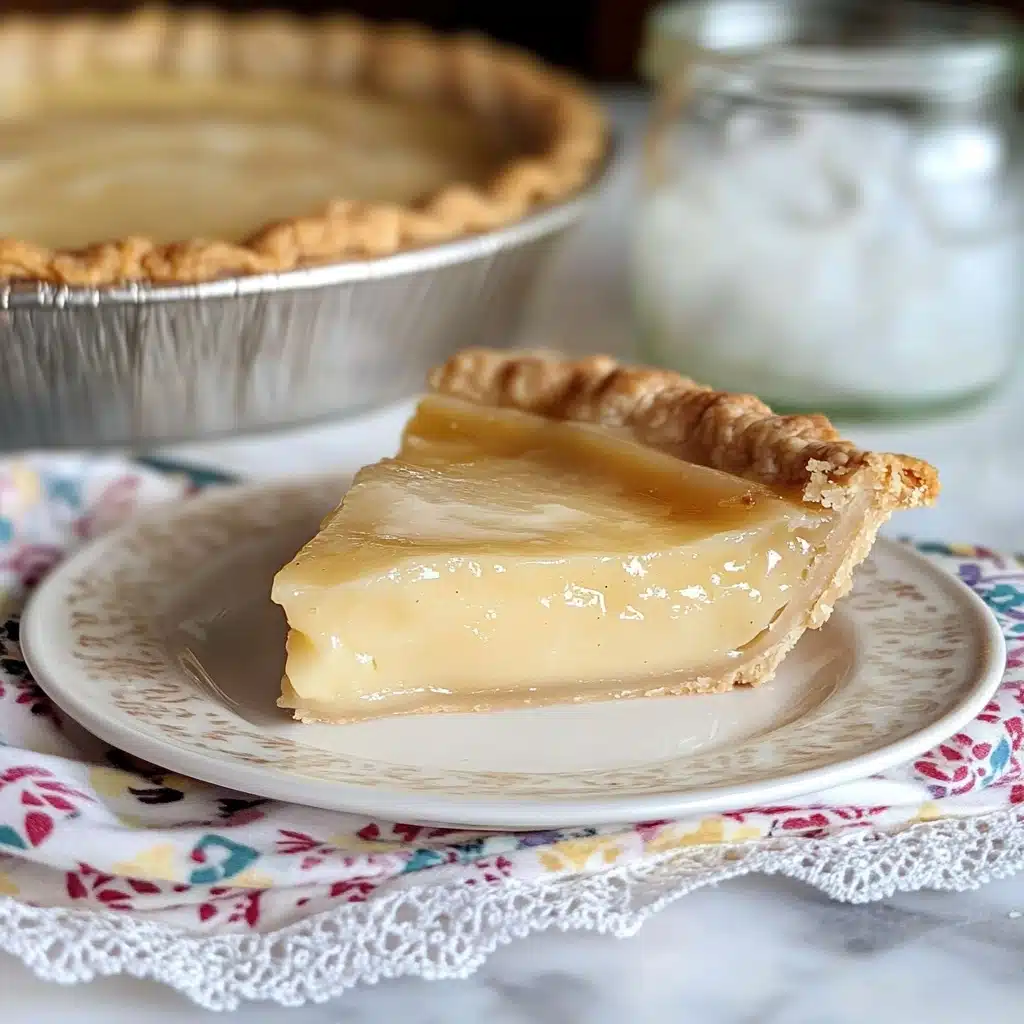
Bake at 400°F for 30 minutes. Then, carefully cover the edges of the crust with foil if they’re browning too fast, reduce the oven temp to 375°F, and continue baking another 30 minutes. Your Water Pie will be wobbly and watery when it’s done baking—this is exactly right! Let it cool completely, then chill it in the fridge until set before slicing.
Pro Tips for Making Water Pie
- Crust Shielding: Use foil or a pie shield to cover just the edges of your crust during the second half of baking to get a golden finish without burning.
- Chilling is Key: The pie might look too liquid at first—don’t panic! It sets perfectly after several hours in the fridge, turning into a dreamy sliceable dessert.
- Water Quality: If your tap water is heavily chlorinated or flavored, consider using filtered or bottled water—since it’s the star, subtle differences can shine through.
- Serve Cold: For the creamiest slices and best flavor, serve Water Pie fully chilled straight from the fridge—warm slices may not hold together!
How to Serve Water Pie
Garnishes
Although Water Pie shines on its own, a dollop of softly whipped cream or a scattering of fresh berries makes each slice feel extra celebratory and special—the color pops and creamy texture are heavenly!
Side Dishes
Pair Water Pie with a hot cup of coffee or black tea for a classic, comforting finish to any meal. A crisp green apple salad, or a bright fruit salad, also makes a refreshing side if you want to balance the sweetness.
Creative Ways to Present
Try cutting Water Pie into small, bite-sized squares and serving them on a platter for a tea party, or dress up individual slices with vintage pie servers and floral napkins for a nod to its charming history.
Make Ahead and Storage
Storing Leftovers
Cover leftover Water Pie snugly with plastic wrap or aluminum foil and store it in the refrigerator. It stays fresh and silky for up to 3 days, so you can keep sneaking little slices whenever you crave something sweet.
Freezing
Water Pie freezes beautifully! After chilling and setting completely, wrap slices (or the whole pie) well in plastic wrap and foil, then freeze for up to one month. Thaw overnight in the fridge before serving to maintain its creamy consistency.
Reheating
Water Pie is best served cold for that classic custardy texture, but if you prefer a touch of warmth, you can microwave an individual slice for just 5–7 seconds—any longer and it may lose its shape, so keep it brief!
FAQs
-
Can I use a store-bought pie crust for Water Pie?
Absolutely! A quality store-bought deep-dish crust is perfect for Water Pie and makes the whole process even easier. Just make sure it’s fully thawed if frozen before you start assembling.
-
Why does the Water Pie look runny when it comes out of the oven?
Don’t worry—that’s exactly what’s supposed to happen! As Water Pie cools, the flour thickens the filling and it transforms from watery to a gorgeous, sliceable custard. Be patient and let it chill completely.
-
Can I add other flavors to Water Pie?
Yes! Water Pie is endlessly adaptable. Try adding a splash of almond extract or a pinch of cinnamon and nutmeg for a new twist, or fold in some lemon zest to brighten things up.
-
Is Water Pie gluten-free?
Traditional Water Pie uses all-purpose flour and a wheat crust, so it’s not gluten-free as written. However, you can substitute a gluten-free pie crust and a 1:1 gluten-free flour blend for a safe and tasty alternative.
Final Thoughts
If you’ve never tried Water Pie before, now is the perfect moment to experience its comforting sweetness and slice of American history. Give it a go—you just might discover a new favorite to share and pass down!
Print
Water Pie Recipe
- Prep Time: 15 minutes
- Cook Time: 1 hour
- Total Time: 1 hour 15 minutes
- Yield: 1 pie (4 servings)
- Category: Dessert
- Method: Baking
- Cuisine: American
- Diet: Vegetarian
Description
Water Pie is a unique and simple dessert that magically transforms a few basic ingredients into a delicious treat. With a crispy crust and a gel-like filling, this pie is a refreshing surprise for any occasion.
Ingredients
Pie Crust:
- 1 9-inch deep-dish pie crust, unbaked
Filling:
- 1 1/2 cups water
- 4 tablespoons all-purpose flour
- 1 cup sugar
- 2 teaspoons vanilla extract
- 5 tablespoons butter, cut into 5 pieces
Instructions
- Preparation: Preheat oven to 400°F and place the empty pie crust on a baking sheet.
- Fill the Pie: Pour 1 1/2 cups of water into the pie crust.
- Prepare the Topping: In a small bowl, combine flour and sugar, then sprinkle this mixture evenly over the water in the crust without stirring.
- Flavoring and Baking: Drizzle vanilla extract over the water and place butter pieces on top. Bake at 400°F for 30 minutes, then reduce heat to 375°F. If needed, cover the crust edges to prevent burning and bake for an additional 30 minutes.
- Cooling and Serving: The pie will appear watery when hot but will set as it cools. Allow it to cool completely, refrigerate until chilled, and then cut into slices to serve.
Nutrition
- Serving Size: 1 slice (1/4 of pie)
- Calories: 178 kcal
- Sugar: 18g
- Sodium: 109mg
- Fat: 9g
- Saturated Fat: 4g
- Unsaturated Fat: 4g
- Trans Fat: 0g
- Carbohydrates: 24g
- Fiber: 0g
- Protein: 1g
- Cholesterol: 15mg


